
Create an instance.
Everything you run on OriginChain lives on an instance - one database with its own region, compute, storage, and endpoint. The console gives you two ways to get one: a free database in a single click, or a dedicated instance you build to size. This page walks both, screen by screen.
Get to the launch screen.
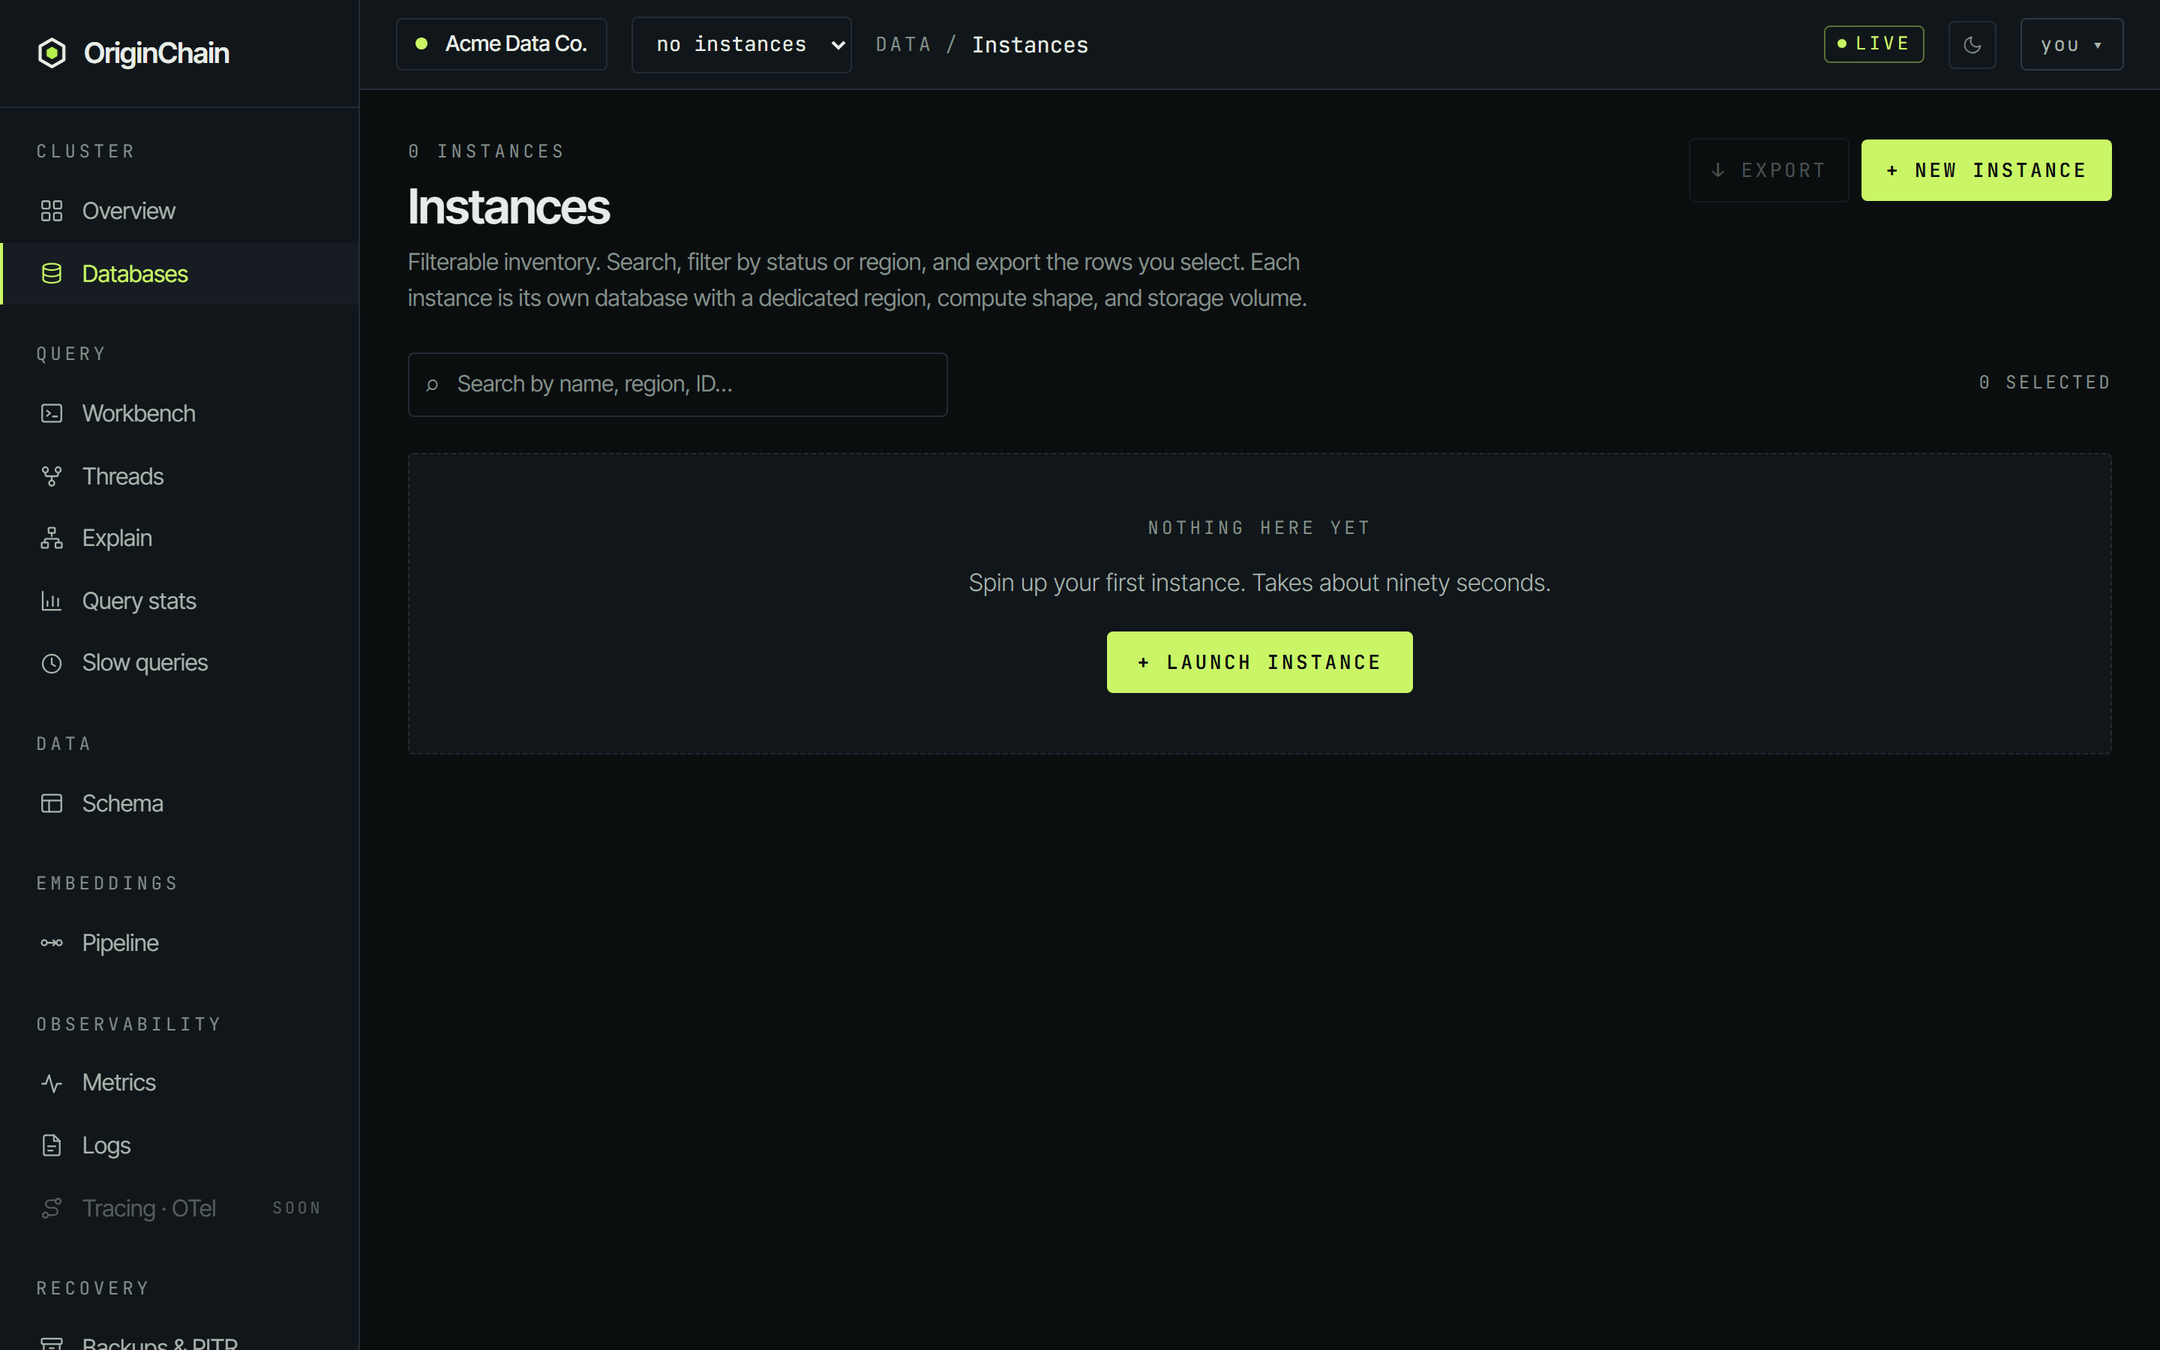
Sign in at app.originchain.ai and open Databases in the sidebar. The page is titled Instances - it's your whole inventory, one row per database.
There are two ways in, and they go to the same place:
- + New instance, top right - always there.
- + Launch instance, in the empty state you see on a brand-new account.
Free or dedicated.
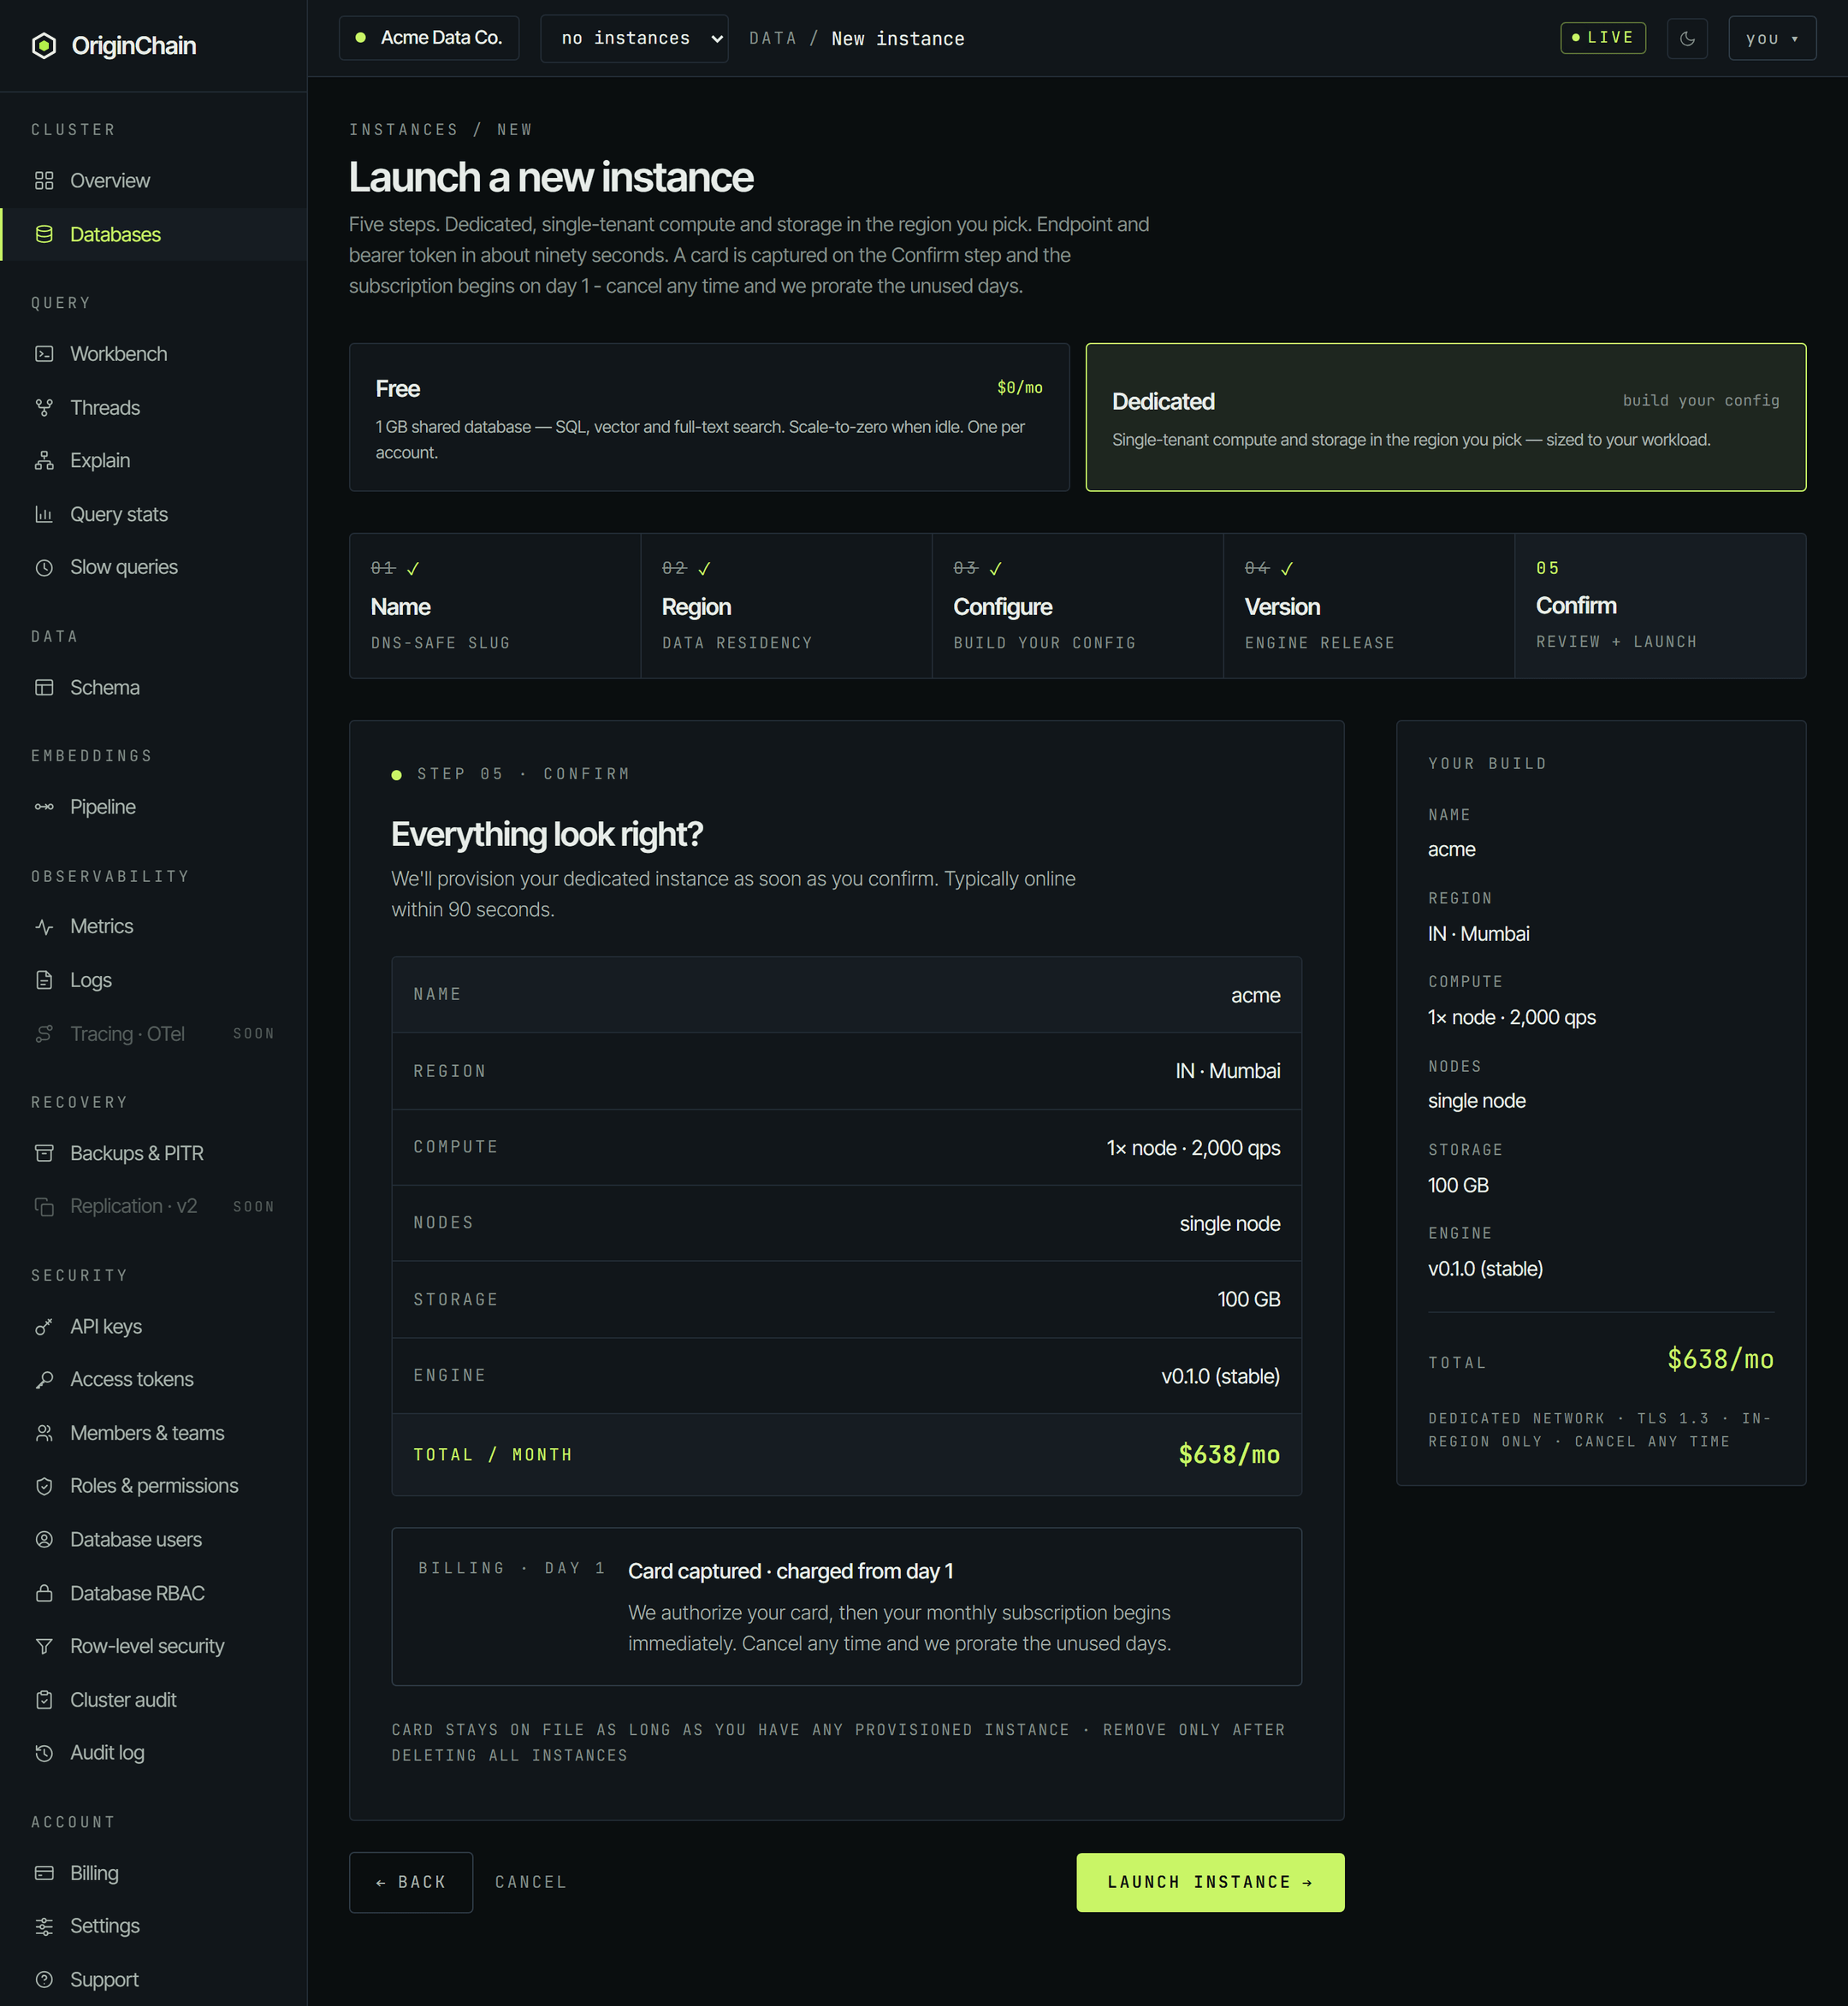
Launch a new instance opens with two cards. Dedicated is selected by default, which is why the five-step rail is showing underneath.
| Card | What the console says |
|---|---|
| Free $0/mo | 1 GB shared database - SQL, vector and full-text search. Scale-to-zero when idle. One per account. |
| Dedicated build your config | Single-tenant compute and storage in the region you pick - sized to your workload. |
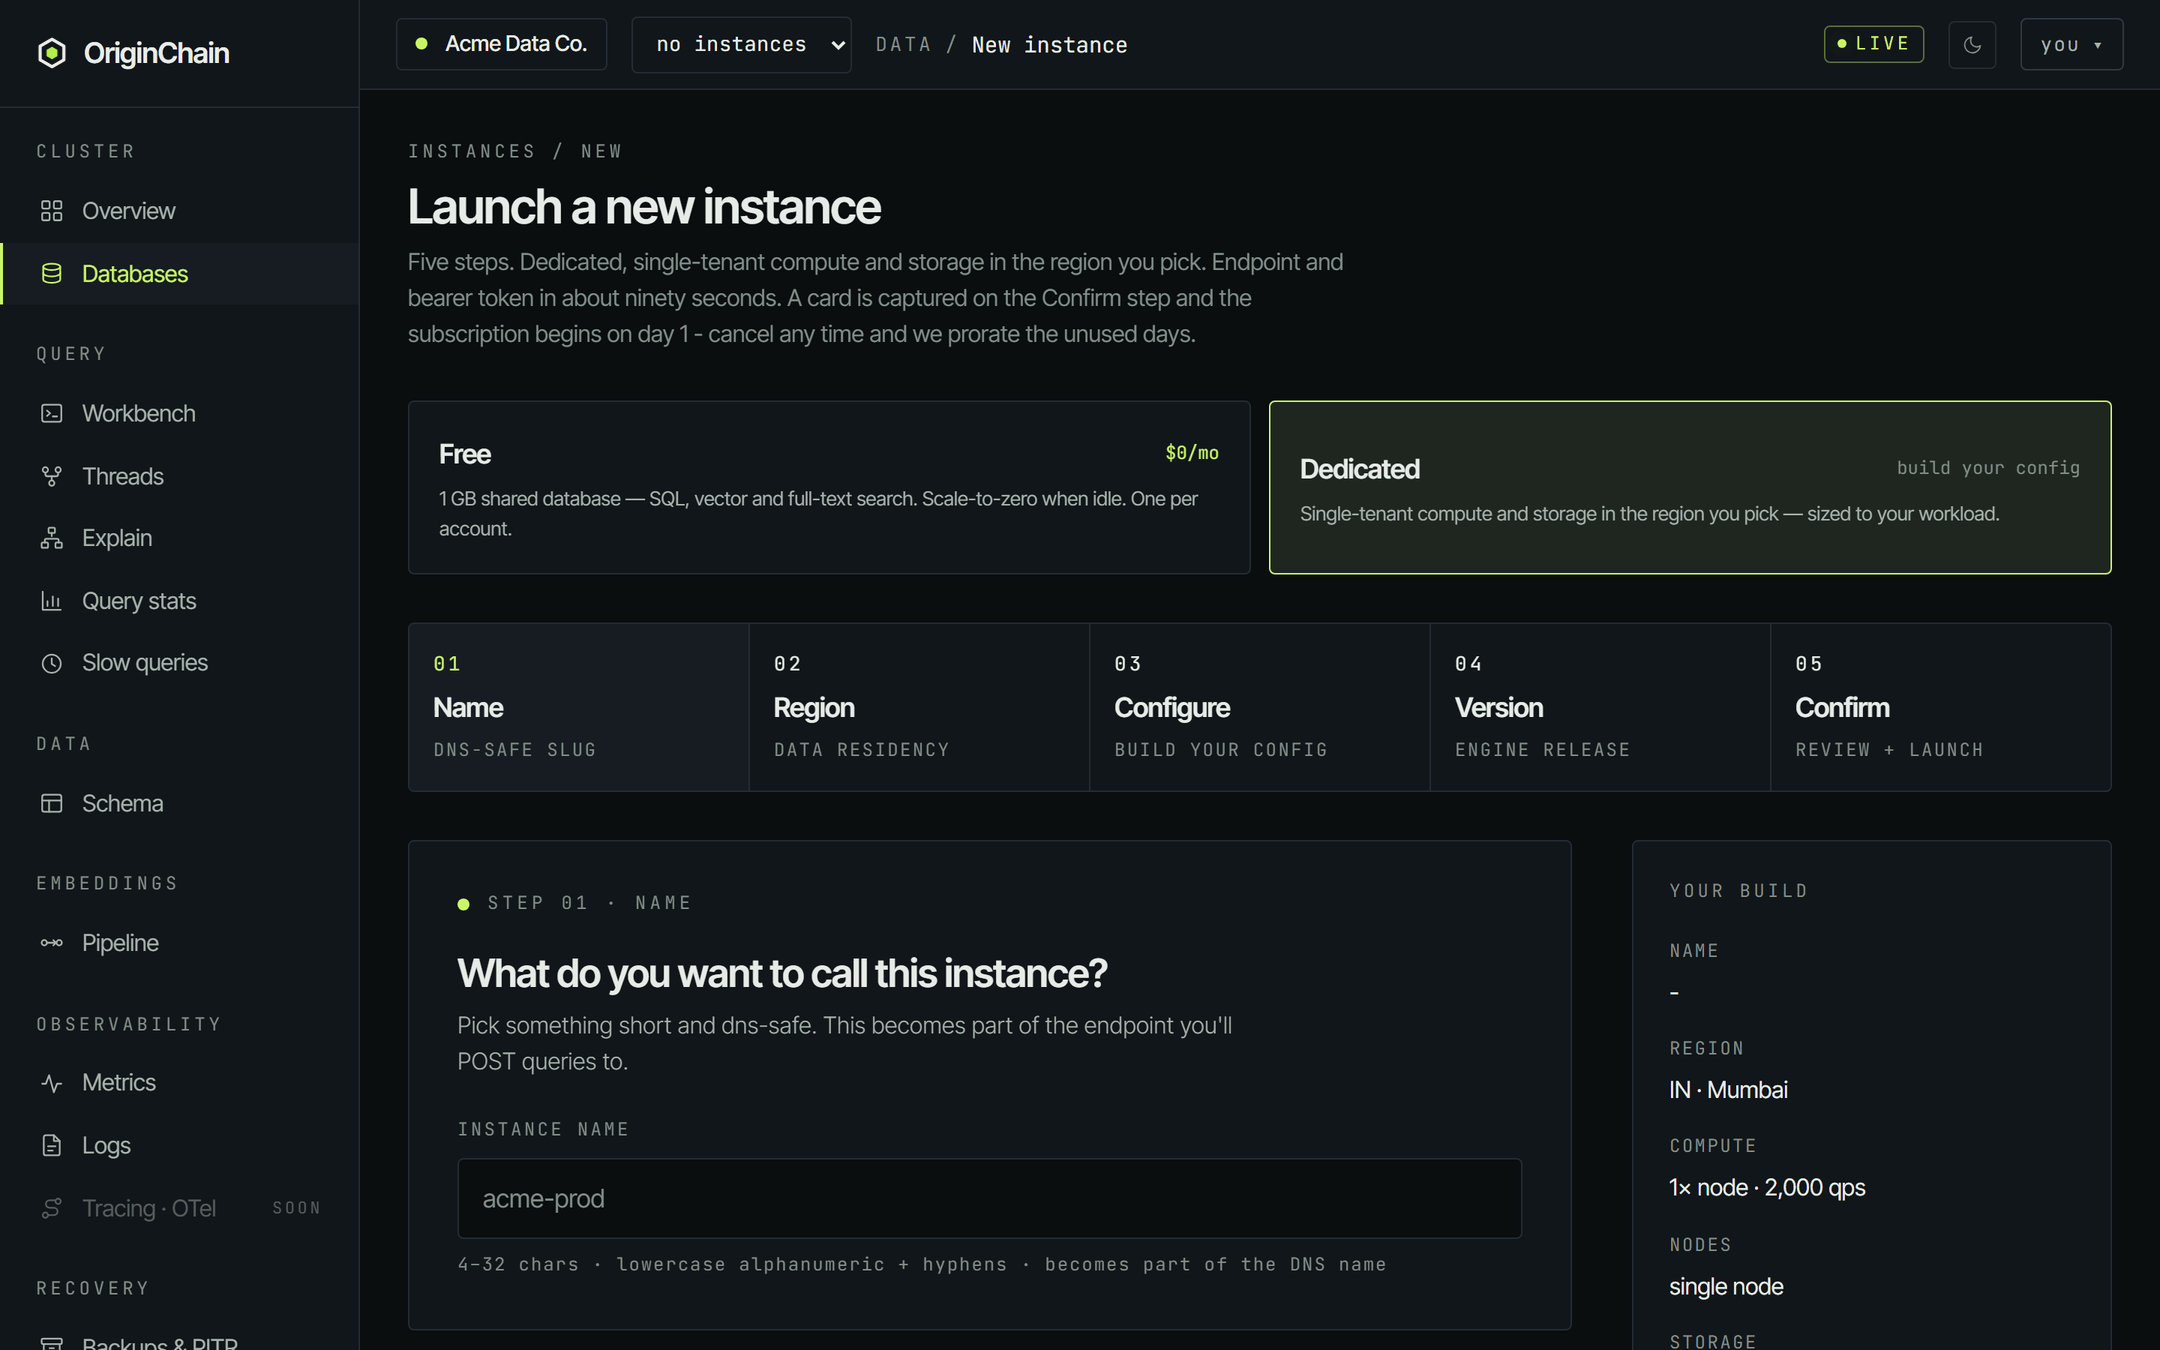
The Free card is limited to one per account. If you already have a free database the card is disabled and reads You already have a free database - launch a dedicated instance instead.
Variant A - the free database.
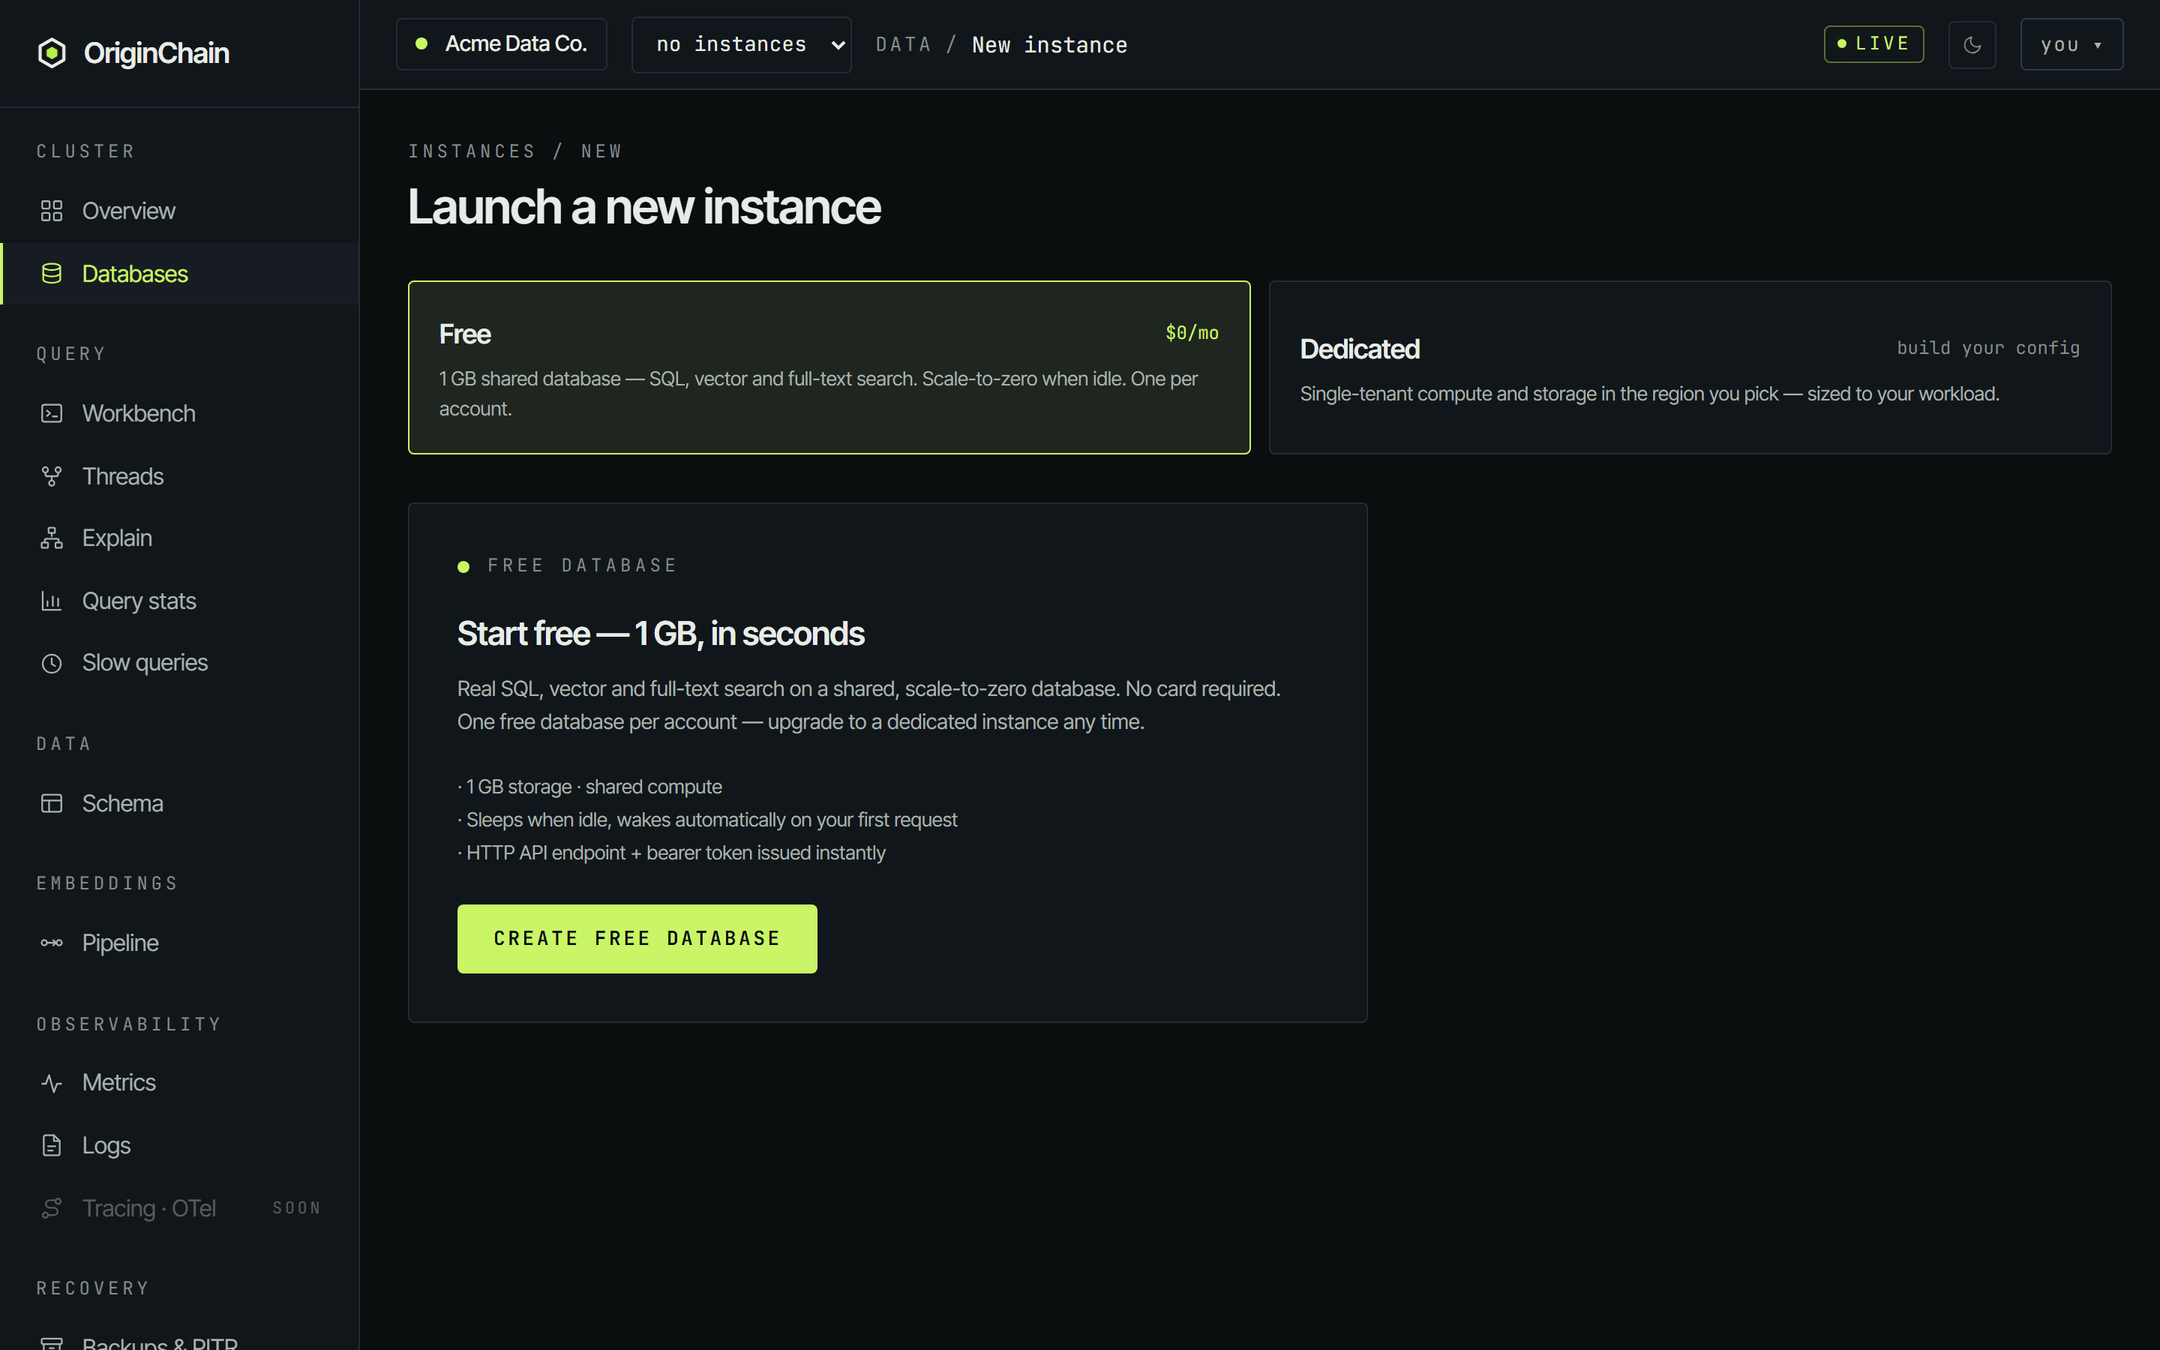
Click Free. The wizard disappears and a single panel takes its place - Start free - 1 GB, in seconds. There is nothing to configure: no region picker, no sizing, no card.
- 1 GB storage on shared compute.
- Sleeps when idle, wakes automatically on your first request.
- HTTP API endpoint + bearer token issued instantly.
Real SQL, vector and full-text search run on it - it's the same engine, just shared and smaller. Press Create free database.
The database shows up under Databases with state RUNNING. Its Configuration column reads free and the $/mo column is a dash - there is nothing to bill.
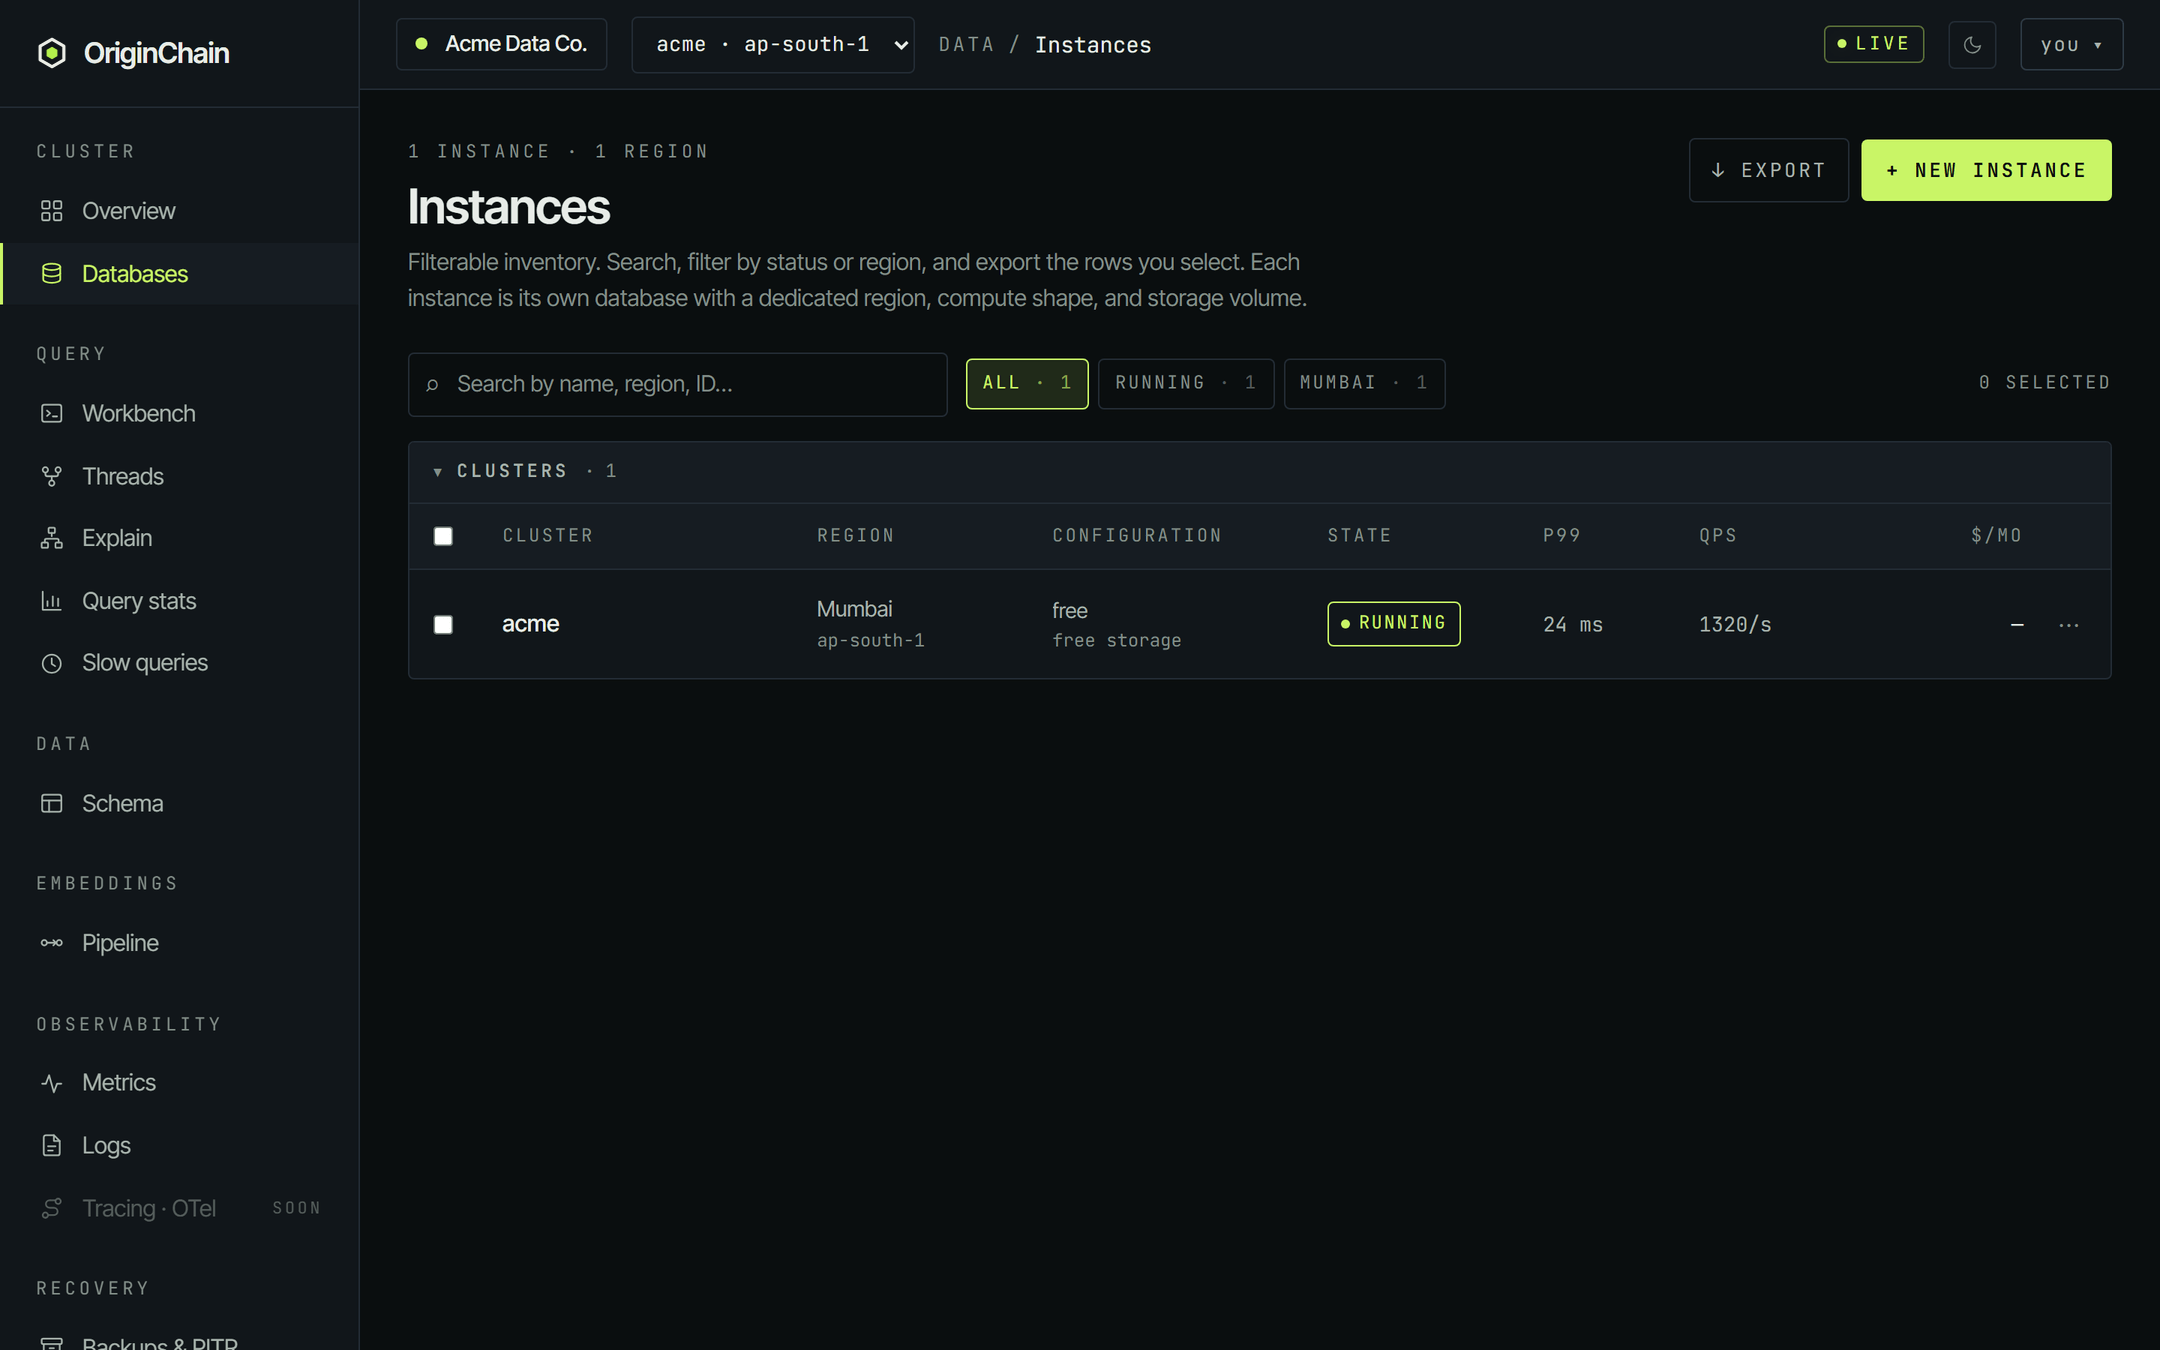
A free database scales to zero when nothing is talking to it, so the list can show it as IDLE rather than RUNNING. That is not a fault - the next request wakes it, and that one request takes a moment longer.
Variant B - a dedicated instance.
Leave Dedicated selected and work down the five-step rail. Continue moves you on, Back returns, and the Your build panel on the right keeps a running summary the whole way.
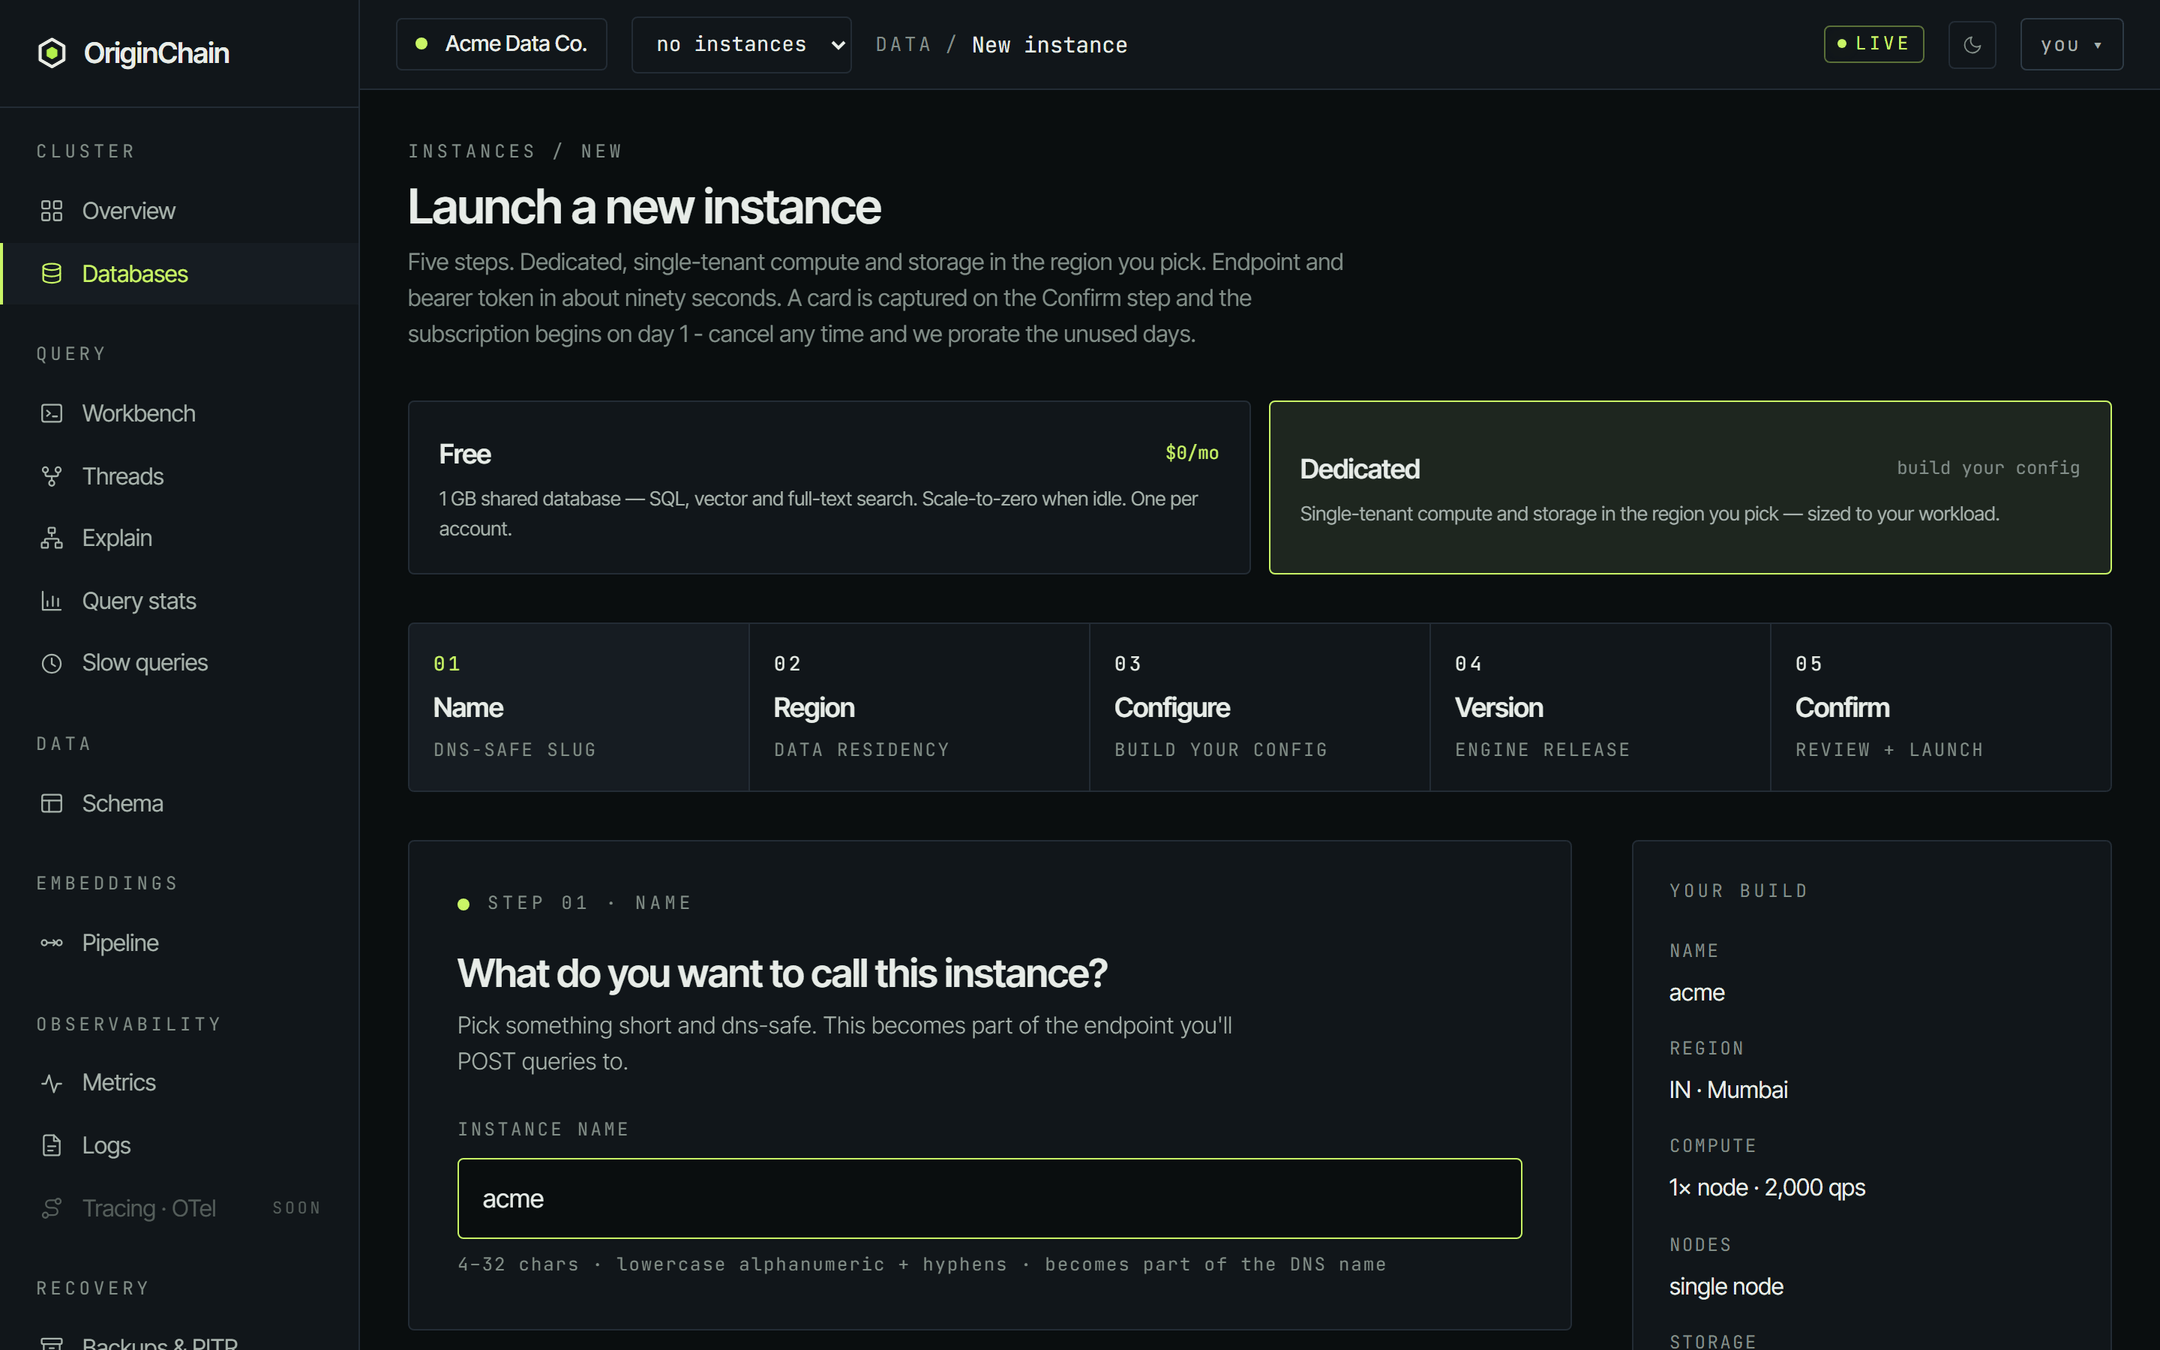
01 · Name
4-32 characters, lowercase alphanumeric plus hyphens. It becomes part of the DNS name your endpoint is served on, so pick something short. The name must be unique inside your organisation - reusing one is rejected with an "already exists" error.
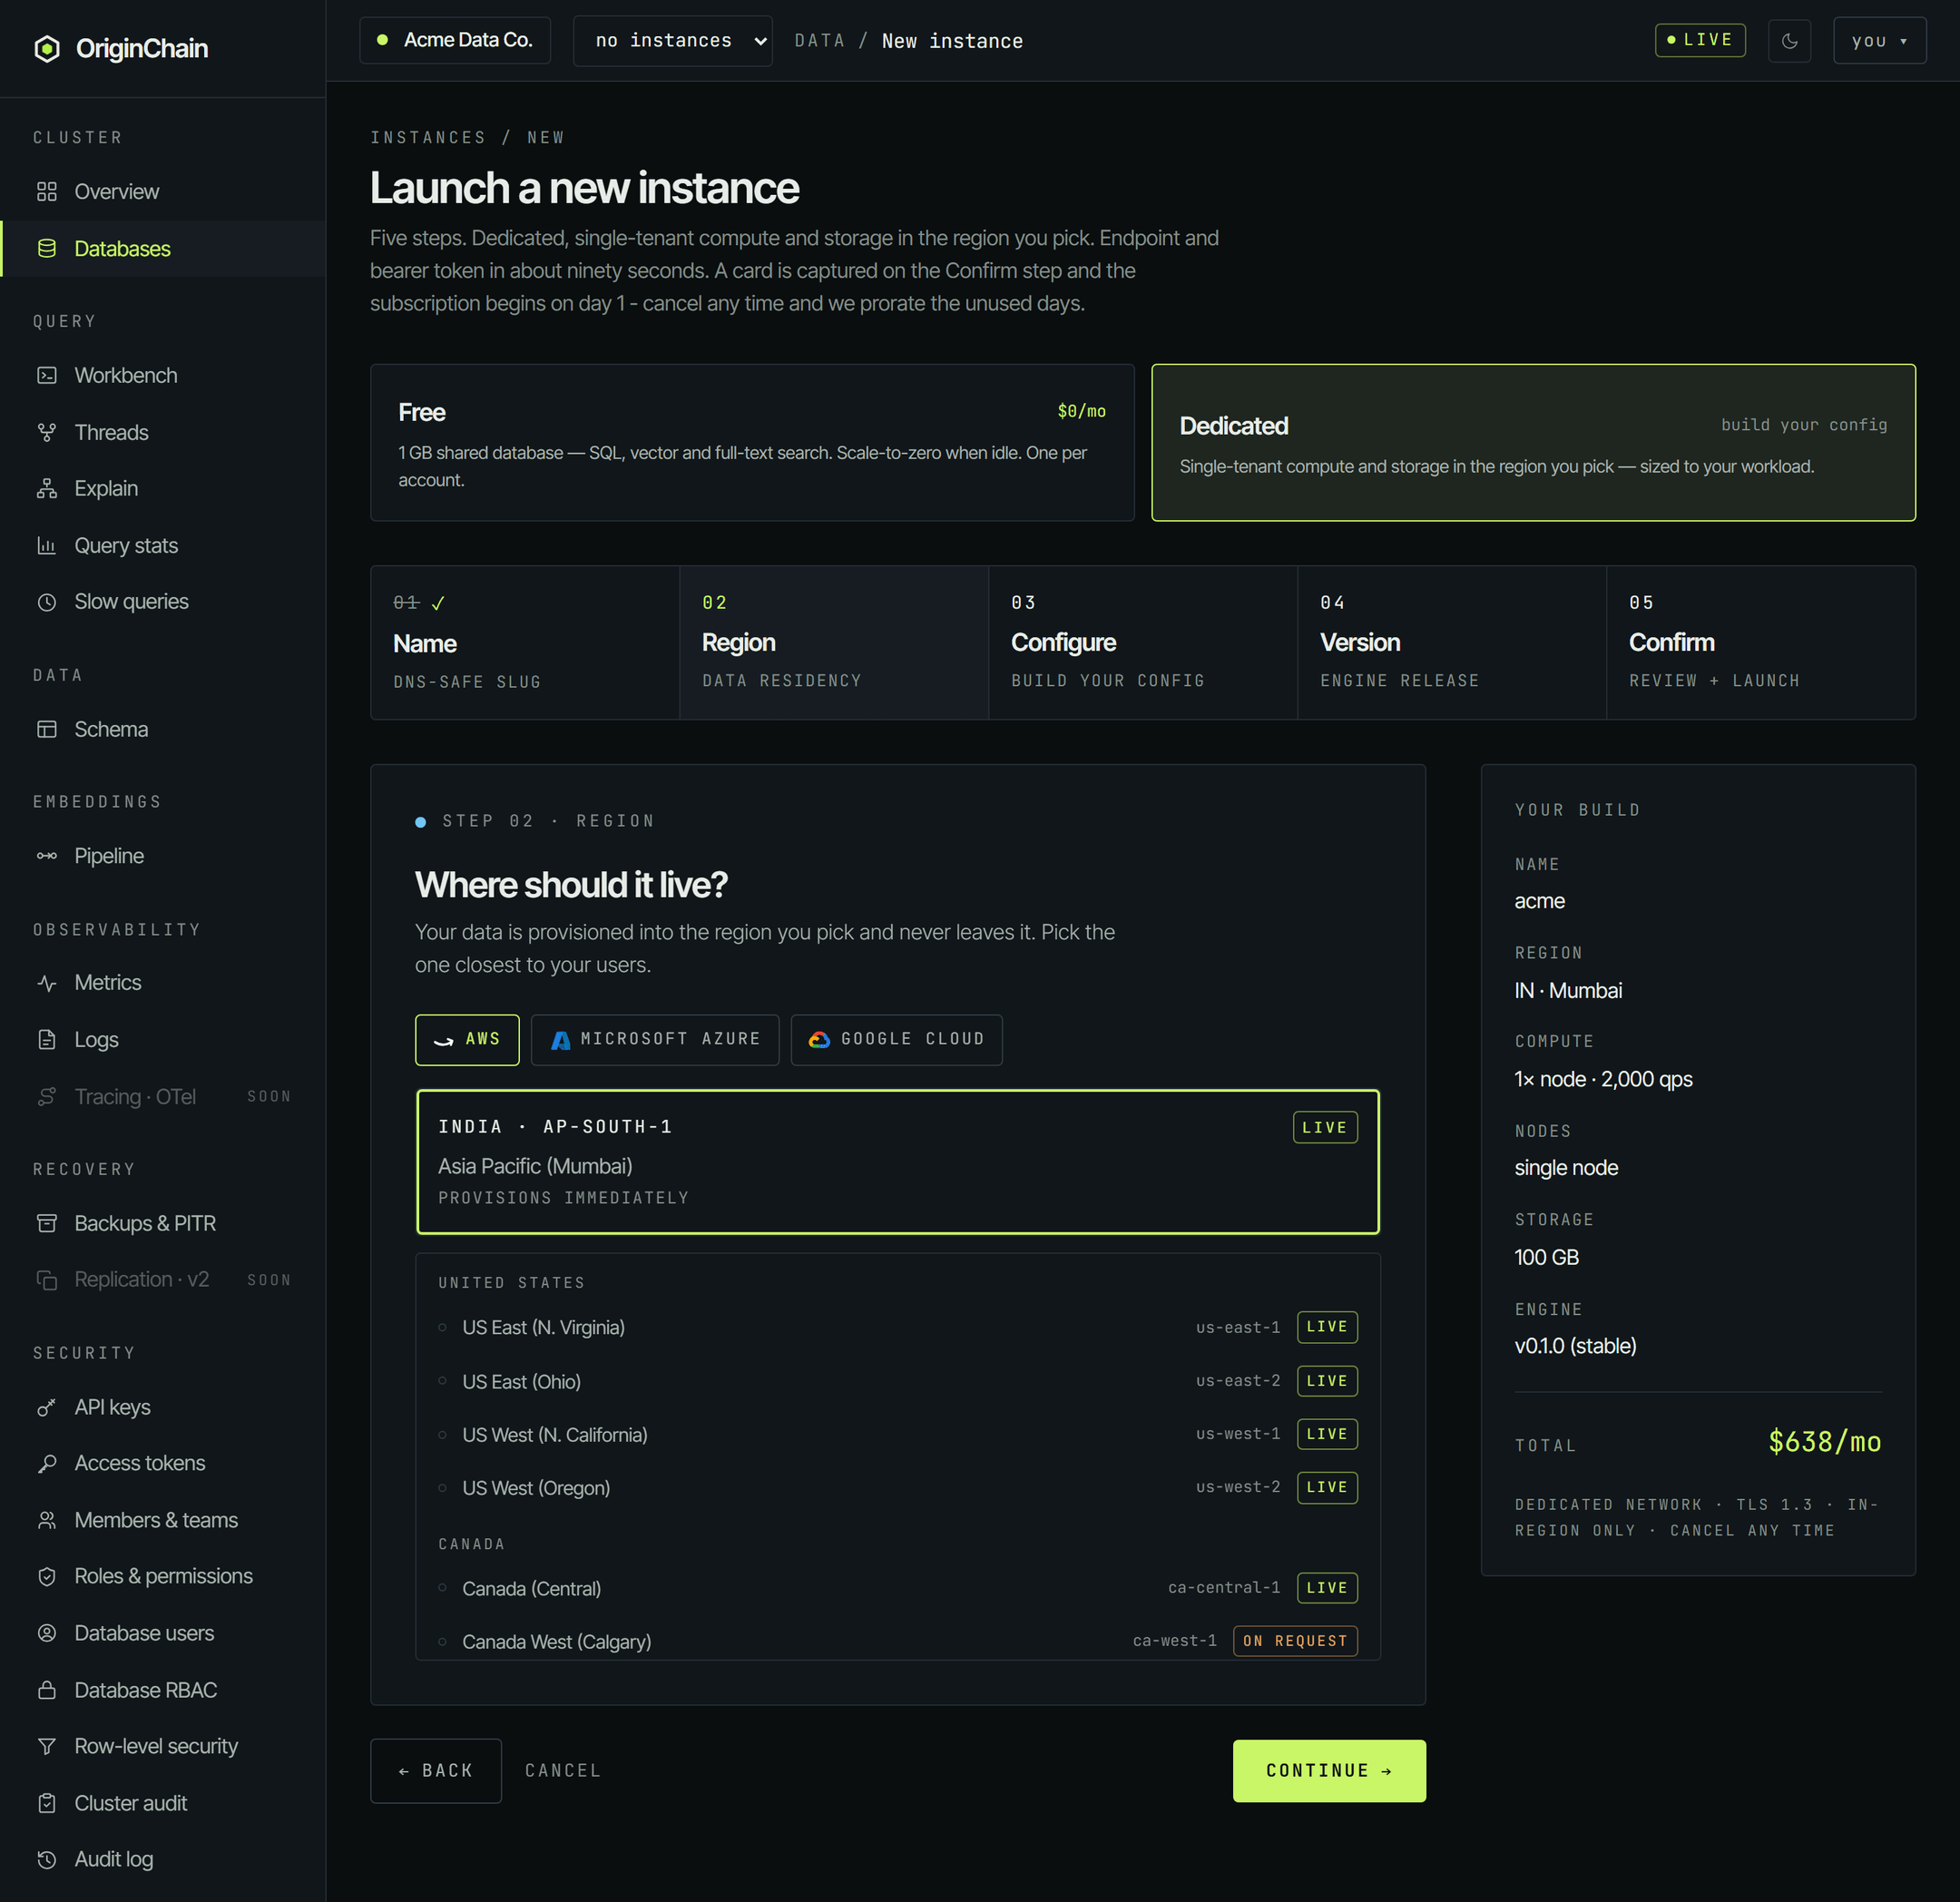
02 · Region
Your data is provisioned into the region you pick and never leaves it. Regions are grouped by cloud - the tab row across the top - and by country underneath. Each row carries a badge:
LIVE- provisions immediately.ON REQUEST- you can still pick it. The launch becomes a request the team is notified about; we bring the region up, approve it, and email you when your instance is provisioning. The console spells this out in a note as soon as you select one.
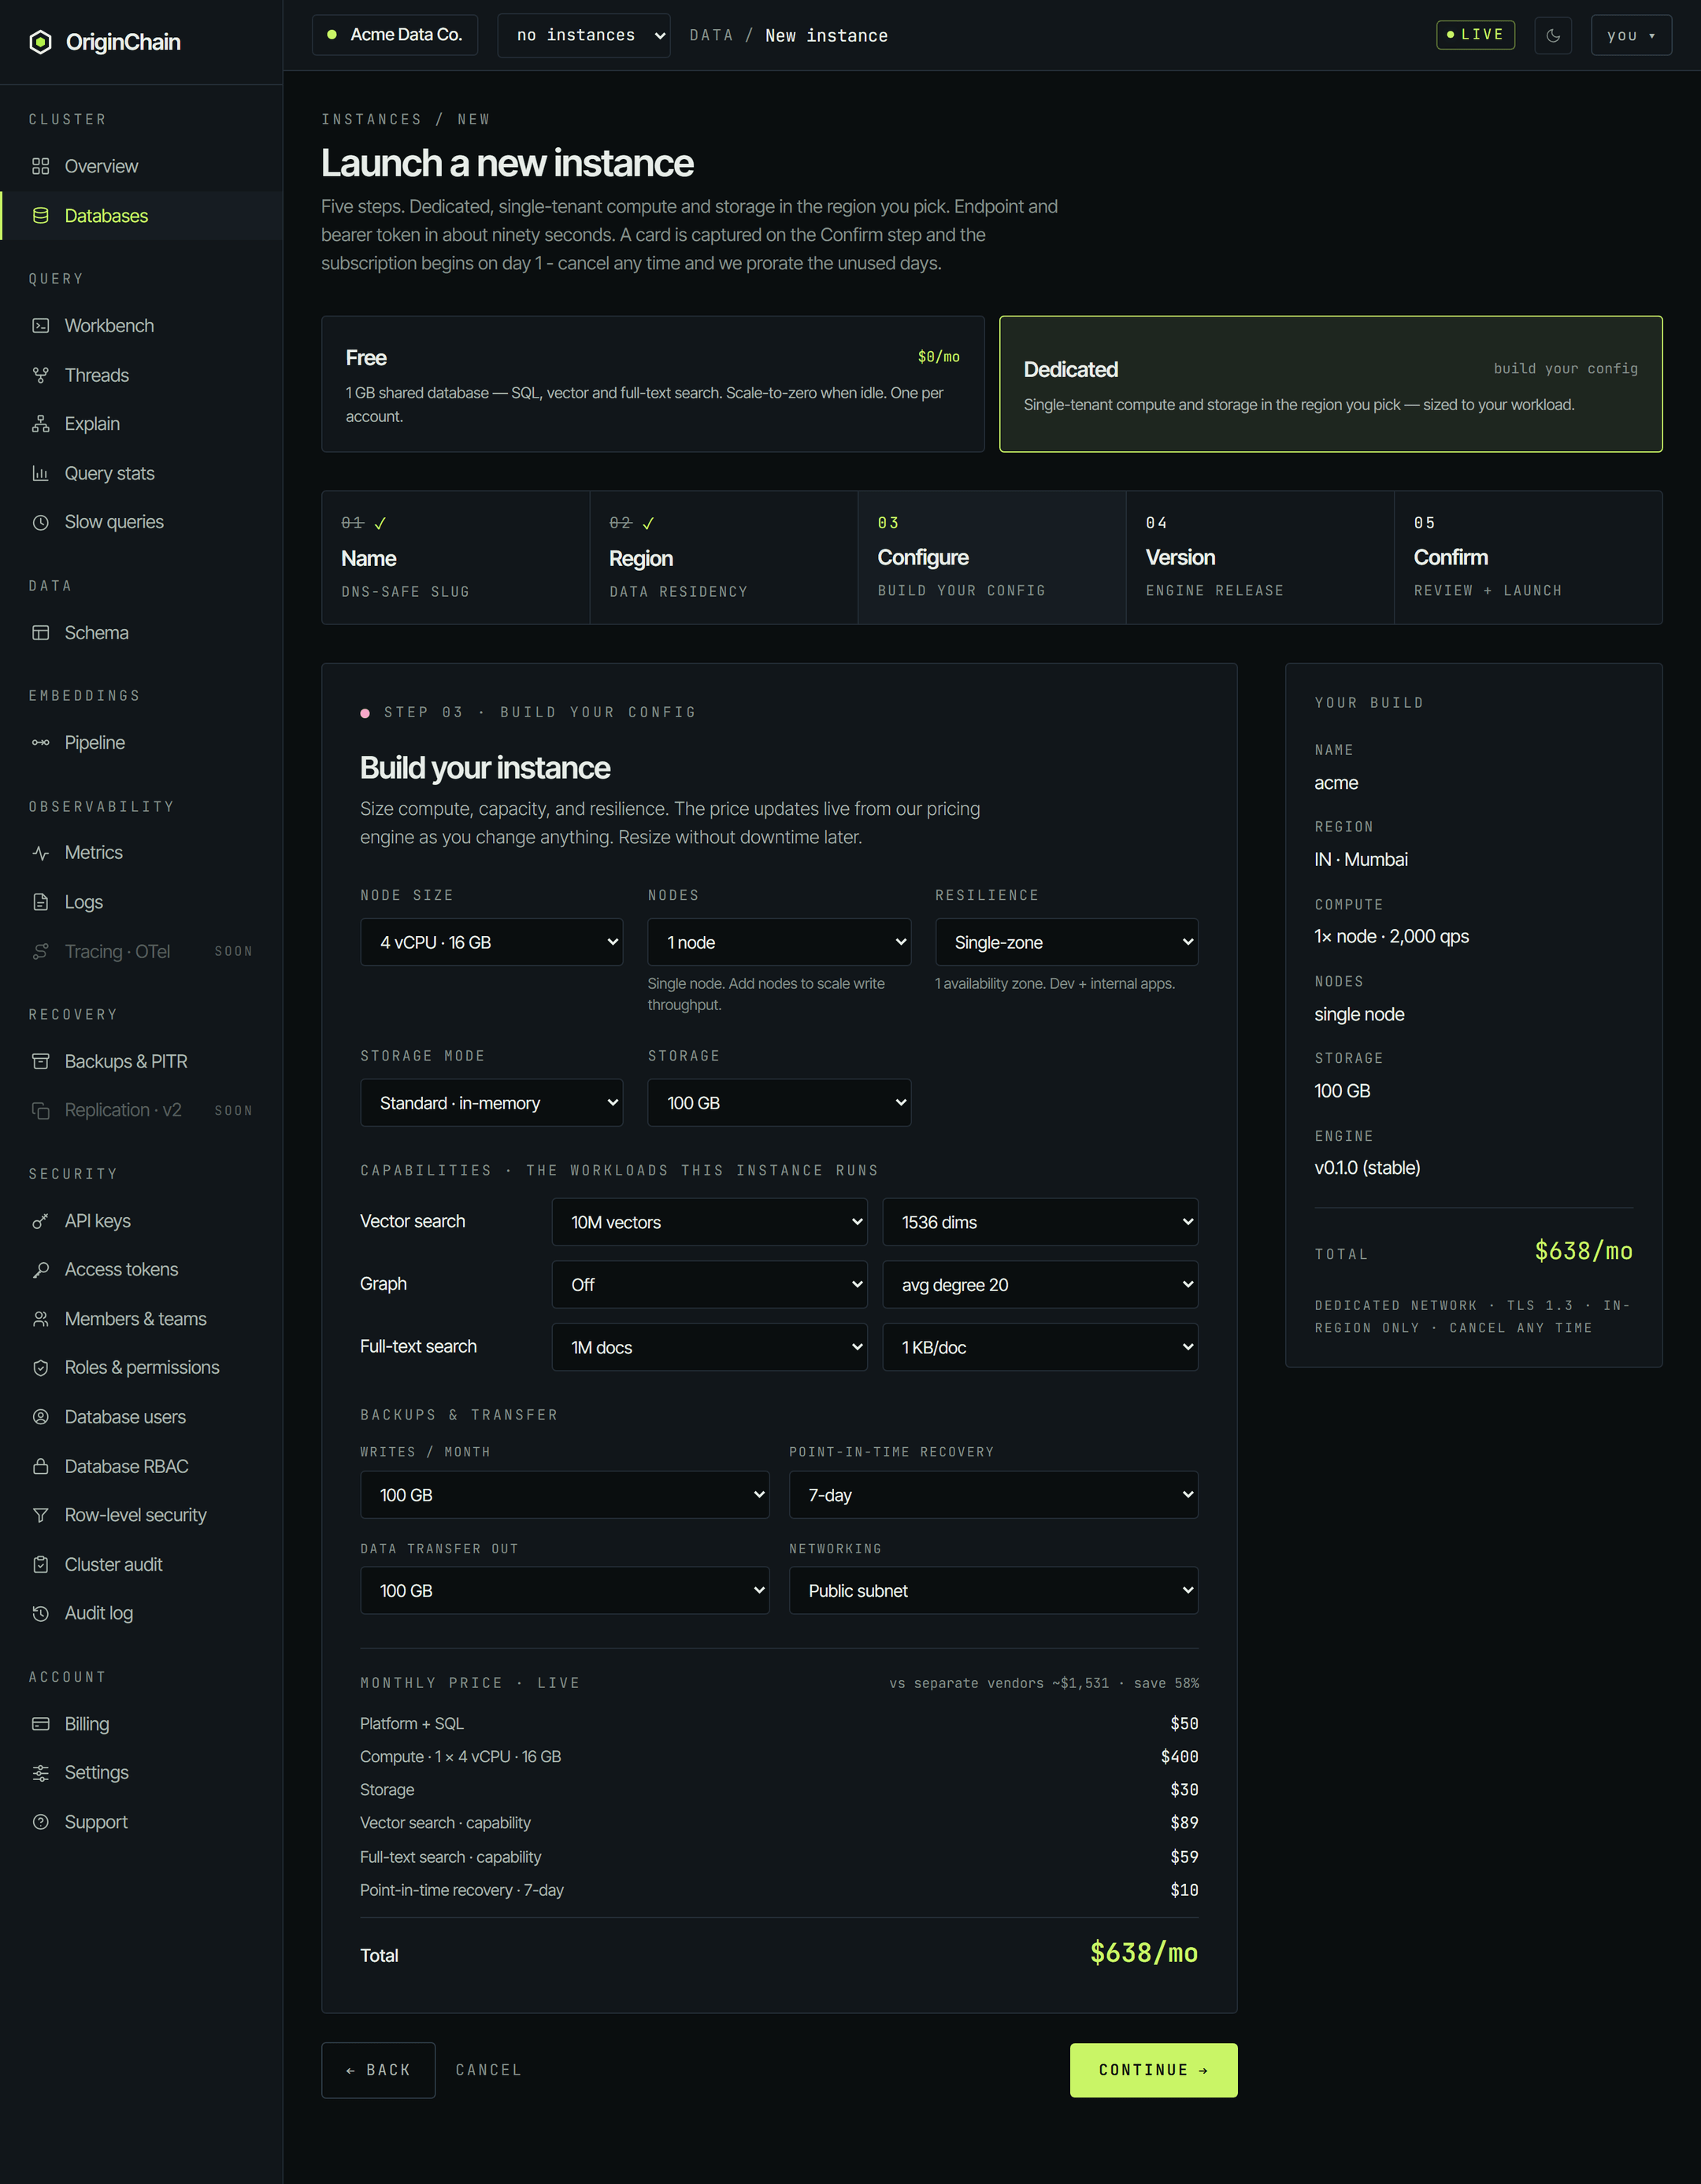
03 · Build your config
This is the step that decides what you get and what you pay. Every control re-prices the build live against the same pricing engine that drives the public build-your-config calculator, so the number under Monthly price · live is the number you'll be billed.
| Control | What it sets |
|---|---|
| Node size | vCPU and RAM per node. |
| Nodes | One node is a single box. More than one shards your data across nodes and scales write throughput; the console shows a note about it when you go above one. |
| Resilience | Single-zone, or high availability - a writer plus a cross-zone standby, which provisions a second node. |
| Storage mode | Standard keeps the working set in memory. Strata is disk-backed for datasets larger than RAM, and adds a cache field. |
| Storage | Provisioned capacity. It can be grown later, without downtime. |
| Capabilities | Vector search, graph, and full-text search - each off, or sized (vector count and dimensions, graph nodes and average degree, document count and size). |
| Backups & transfer | Writes per month, point-in-time recovery window, data transfer out, and the networking model. |
Turning a capability on here is what provisions it - you don't have to add it as an add-on afterwards, and its fee is already inside the total.
Strata is single-box at launch. Selecting it forces resilience to single-zone and nodes to one, and disables the other options so you can't assemble a combination the create API rejects. The console notes that the price shown is the standard-storage price while it's selected.
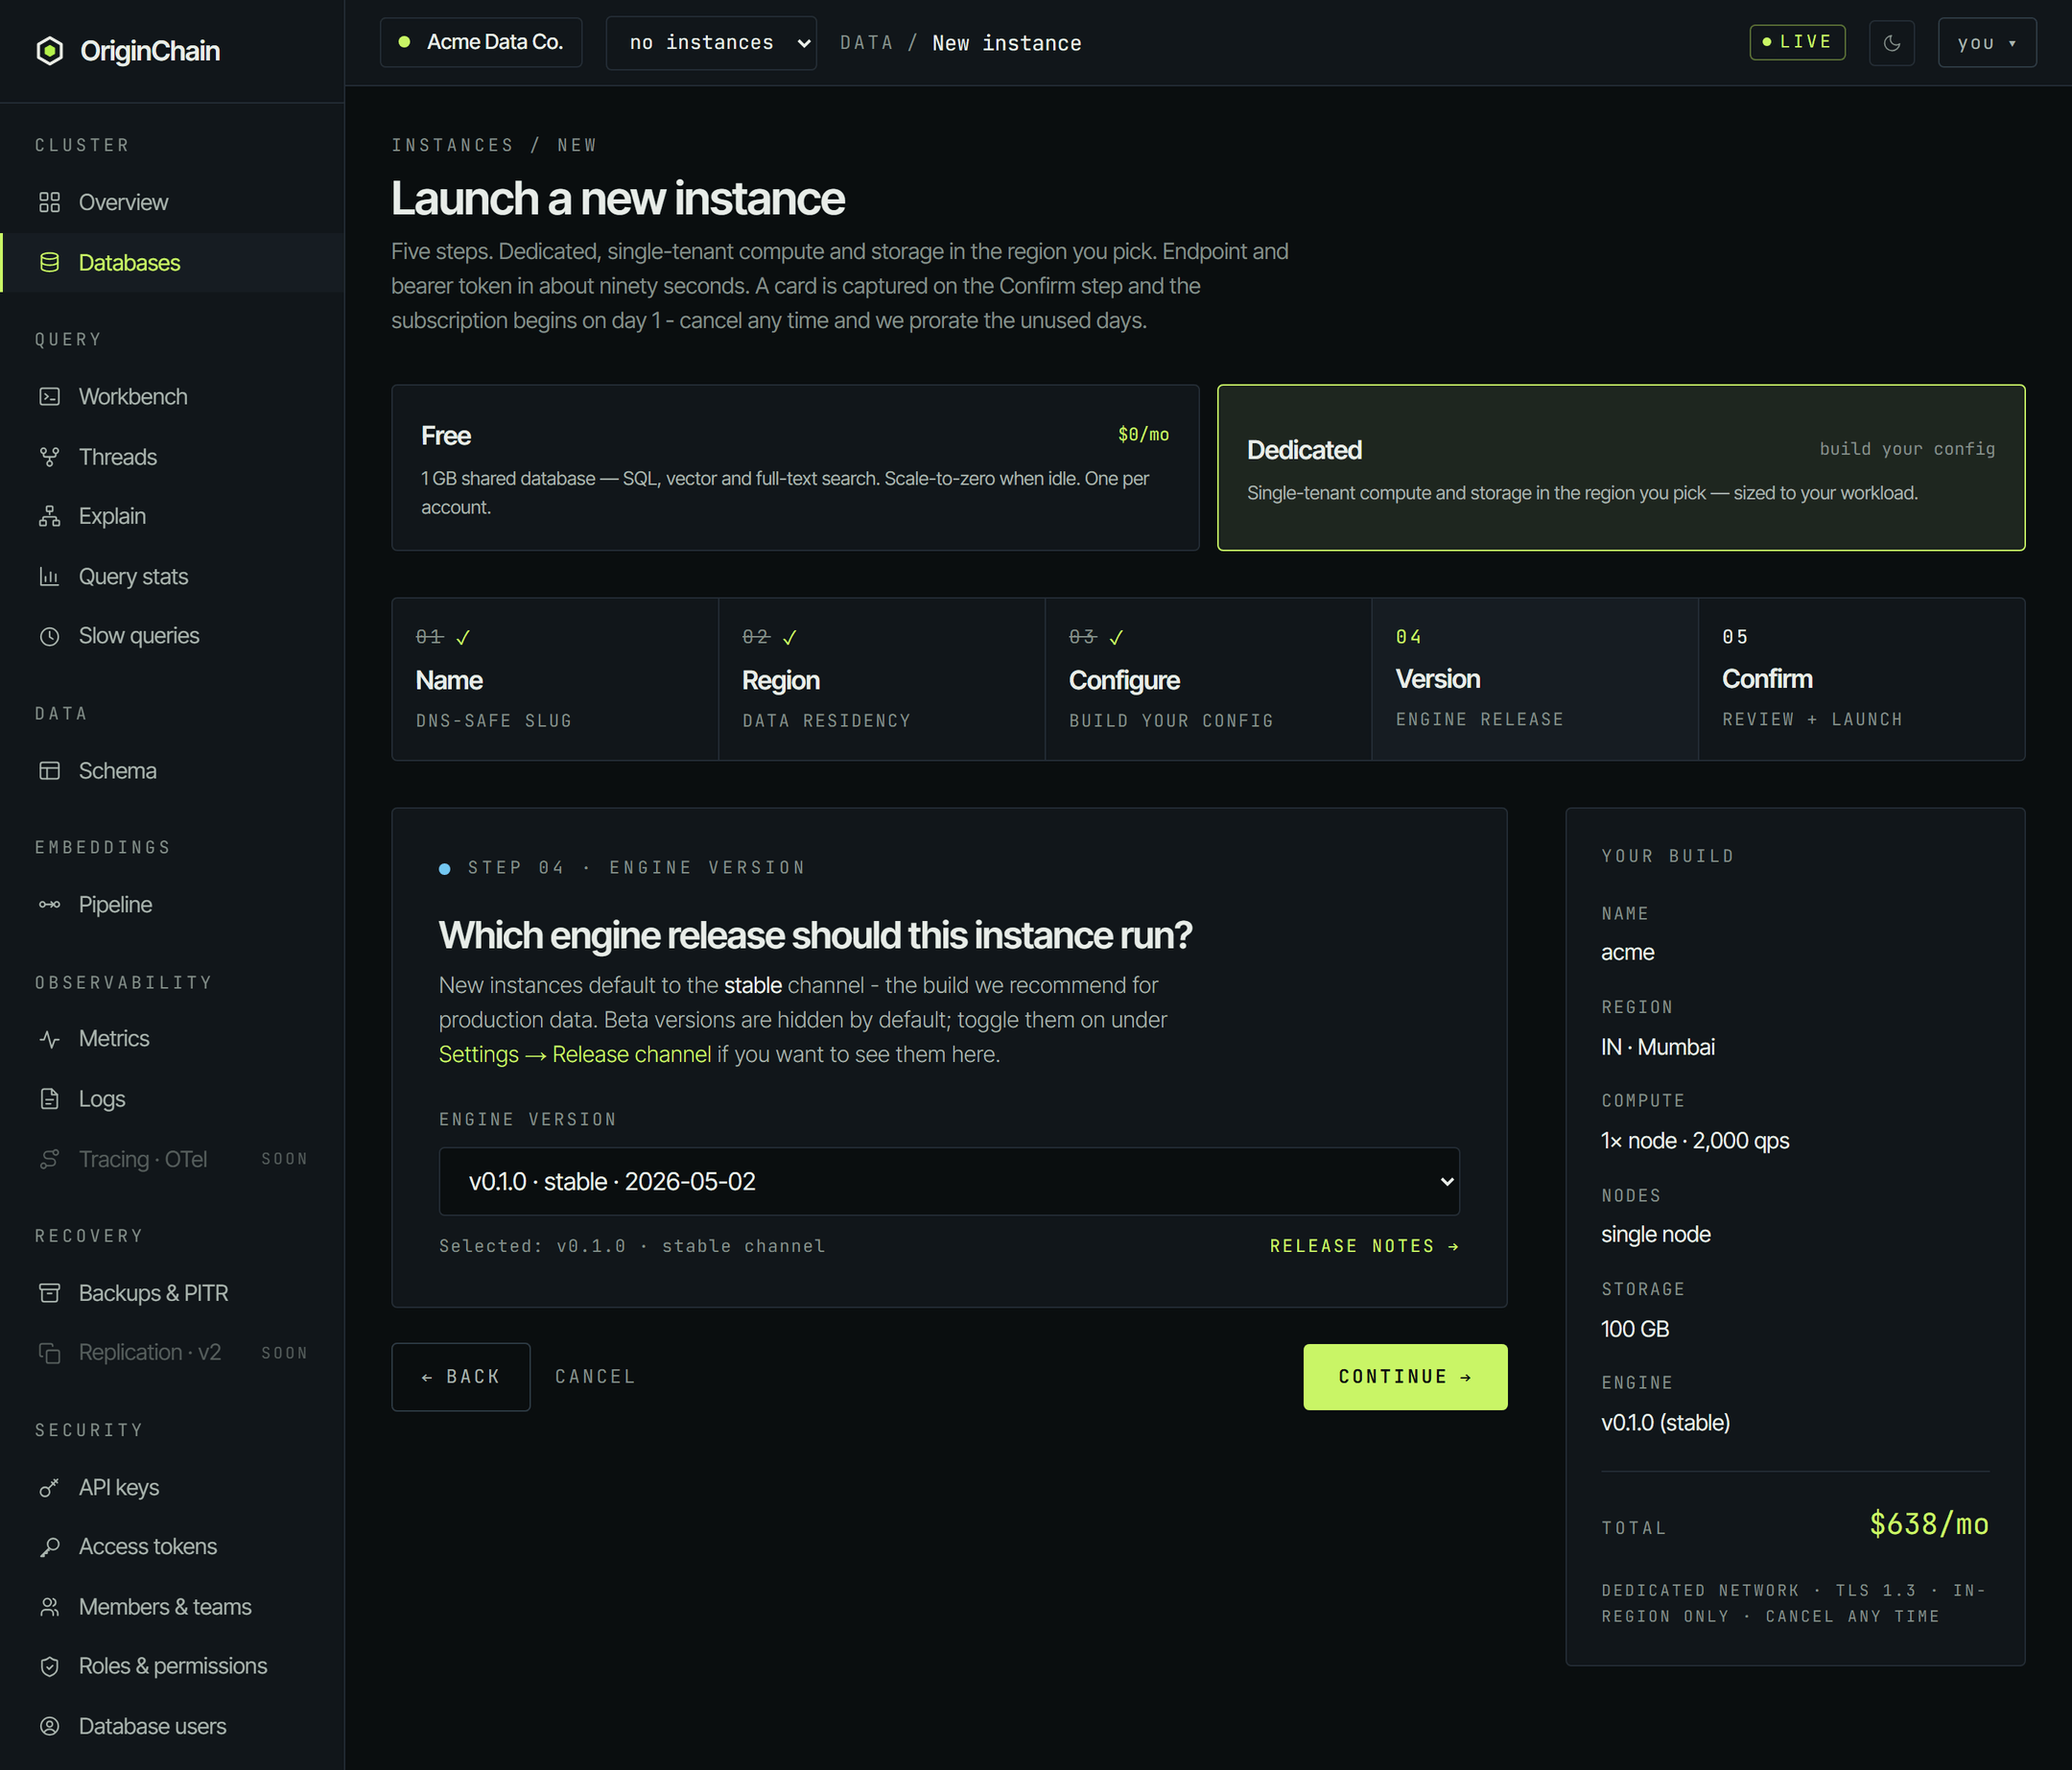
04 · Engine version
New instances default to the stable channel - the build recommended for production data. Beta versions are hidden unless you turn them on under Settings → Release channel. If the version manifest can't be reached the wizard says so and still launches you on the current stable build.
05 · Confirm
The last step restates the build - name, region, compute, nodes, storage, engine - and the monthly total, followed by a billing notice. It reads: the card is authorised, then the monthly subscription begins immediately, and you can cancel any time with the unused days prorated. The card stays on file for as long as you have any provisioned instance.
After you launch.
Launch instance submits the build. A dedicated launch goes through an approval step before anything is provisioned: the console replies with a Request sent confirmation - "your instance request has been sent to the admin and will be activated soon" - and we email you the moment it's ready. Picking a region that isn't live yet lands in the same place, for that reason.
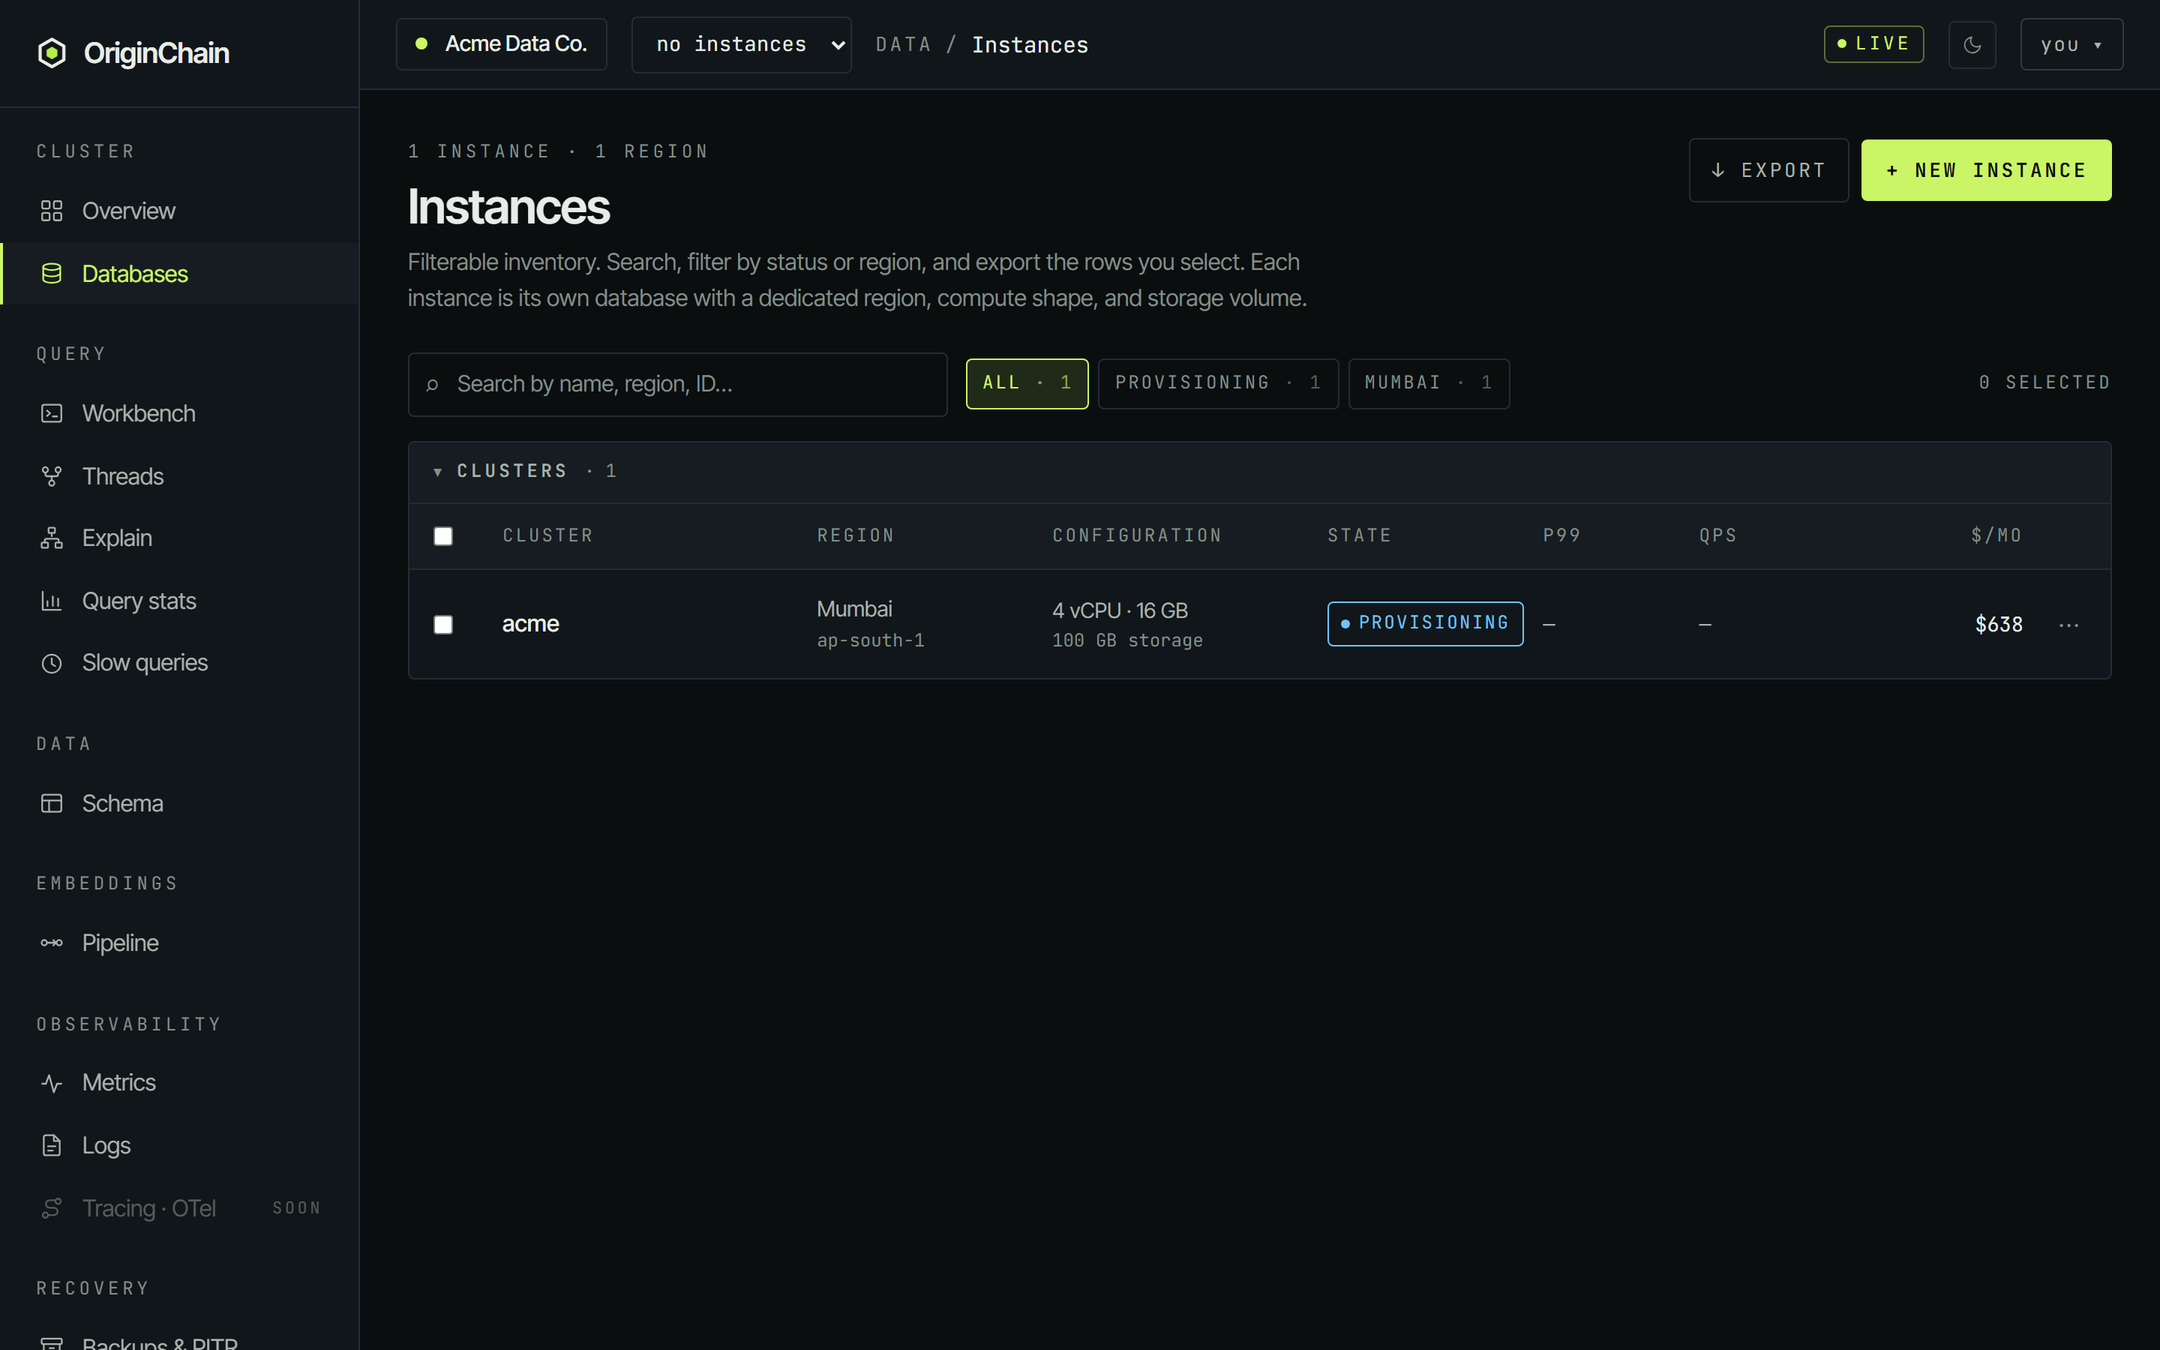
Once it's approved the instance appears in Databases as PROVISIONING. The console's own estimate is about ninety seconds; the P99 and QPS columns stay blank until it's serving.
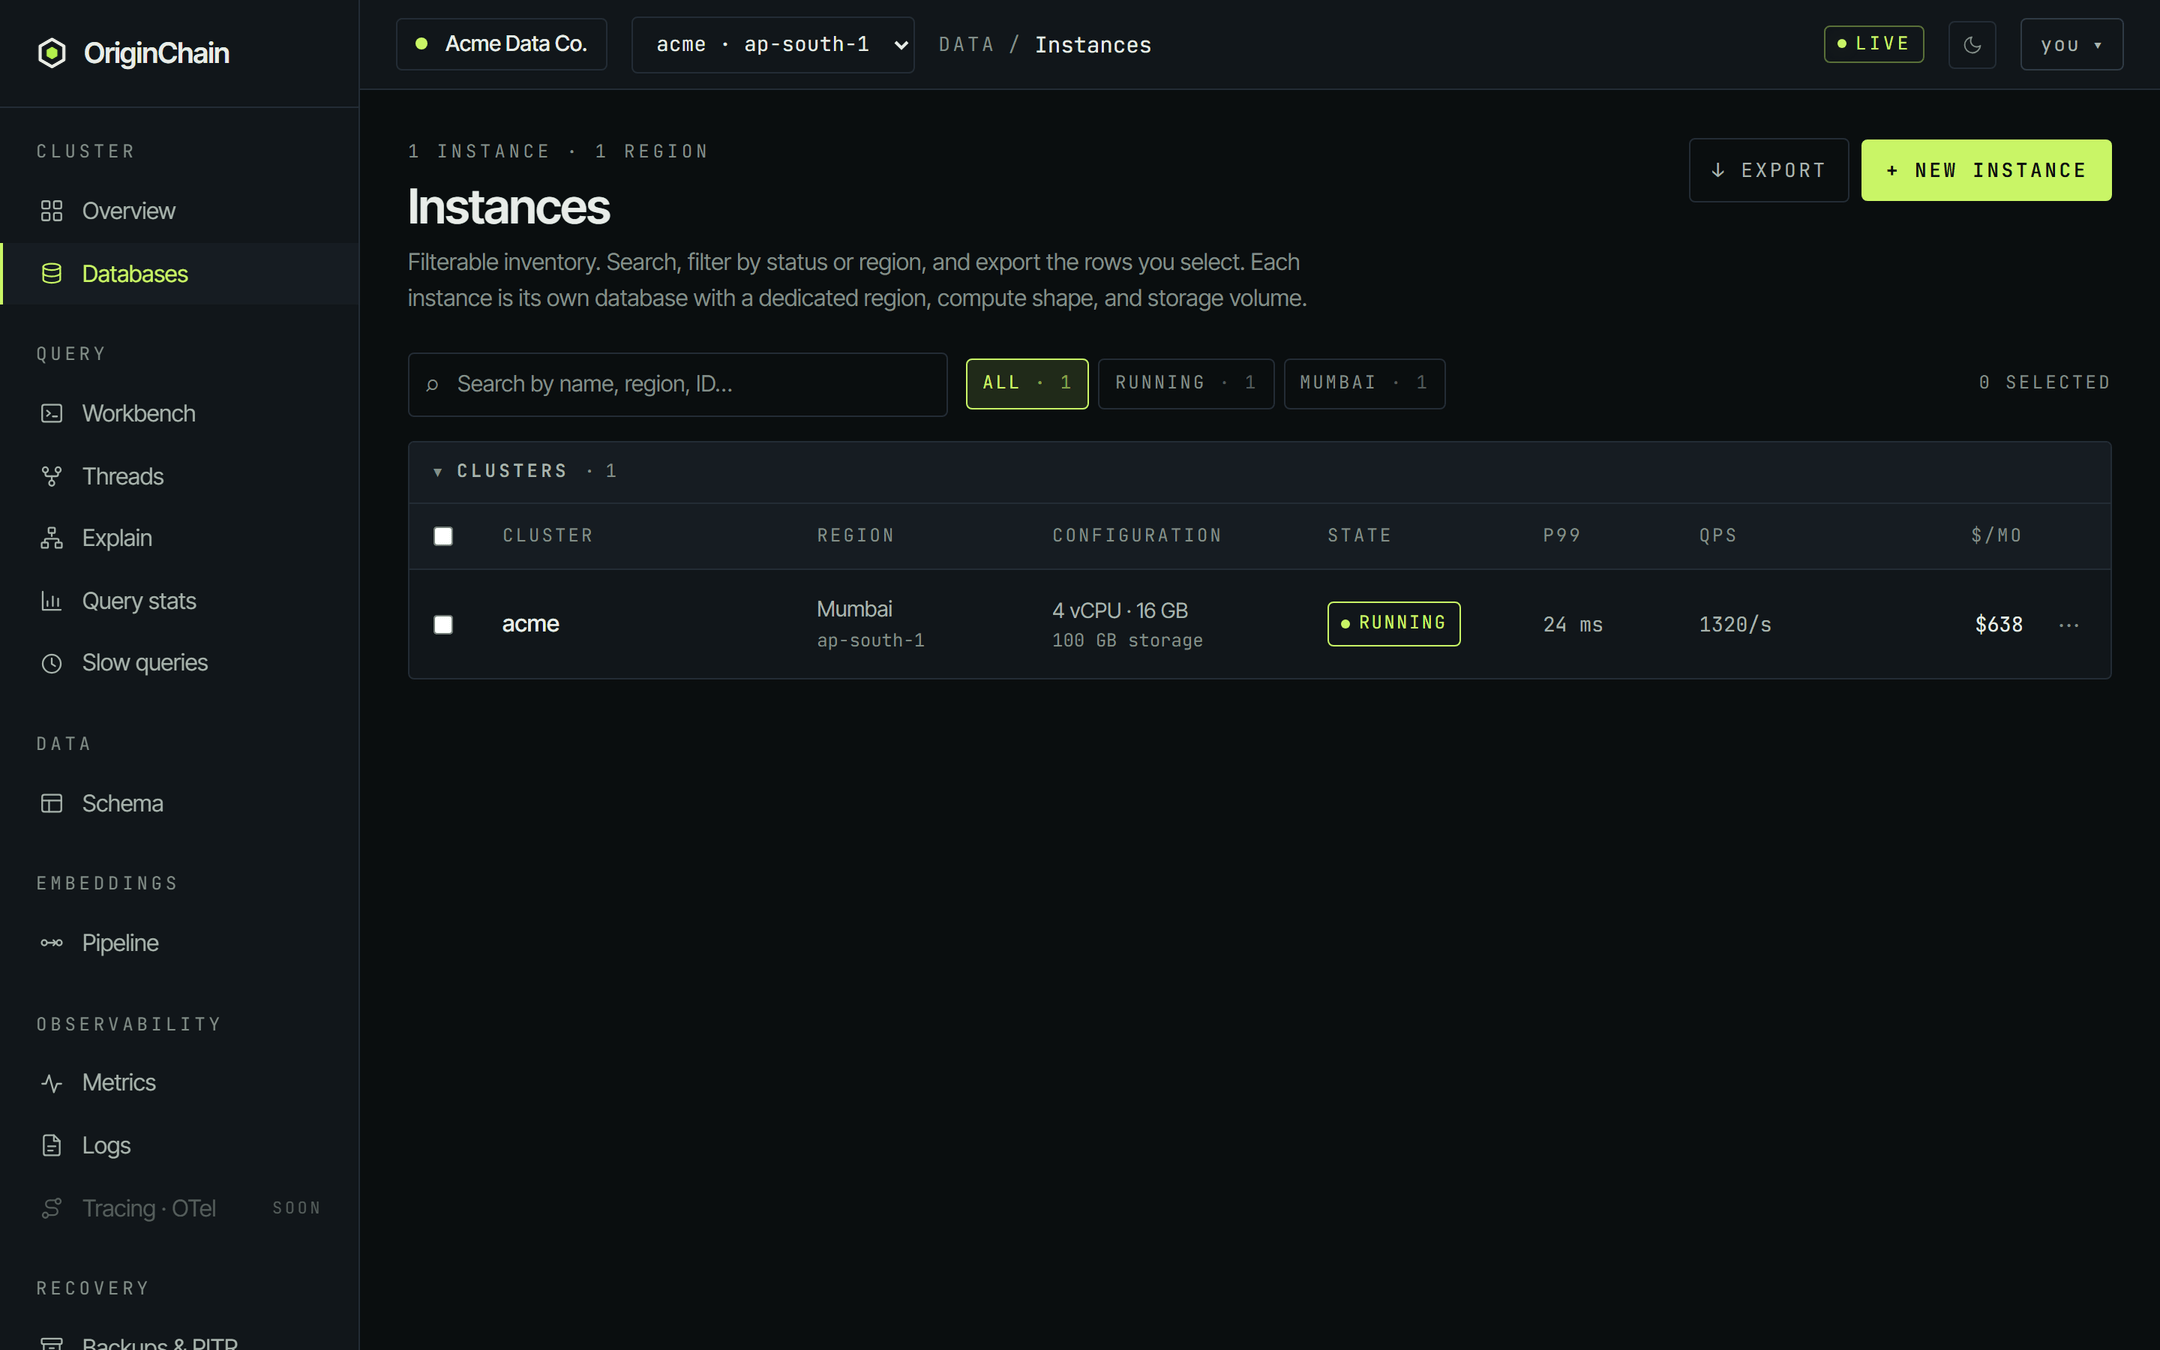
Then it flips to RUNNING and starts reporting live latency and throughput.
The bearer token is displayed once, at creation. Save it somewhere safe. The server only keeps a hash of it, so it cannot be shown again - if you lose it, use Rotate token on the instance's Connection tab to issue a new one (which invalidates the old one).
Where to go next.
- Navigate your database - the instance detail tabs, the sidebar map, and where your endpoint and credentials live.
- Quickstart - take the endpoint and token and run your first query.
- Build and price a configuration before you launch one.